
7 Affordable Ways To Improve Your Curb Appeal in Princeton, WI
When you think about curb appeal, you probably envision big exterior alterations to your property.
They're noticeable, and maybe more importantly, they improve the appearance of your home, increasing the perceived value of your property.
Curb appeal improvement, on the other hand, does not have to be an expensive undertaking; there are ways to improve your curb appeal without going broke.
With that in mind, here are 7 Affordable Ways To Improve Your Curb Appeal in Princeton, WI.
1. Window Planters
Window planters offer a variety of benefits, one of which is that they may help you improve your curb appeal on a budget, which is always a plus.
Furthermore, the plants you add to the outside of your home can truly aid you in the sense that you can grow herbs that you can use in the kitchen, and of course, you can grow flowers that are simply gorgeous to look at from the inside or from the outside.
2. A Fresh New Doormat
When considering how to improve curb appeal, a new doormat may be the last thing on a person's mind, but consider the advantages.
On the other hand, a house with a tattered old doormat that is frayed at the edges and appears to be about to fall apart with a particularly powerful sneeze.
Such a doormat would detract from the property's overall attractiveness; passers-by could notice it and wonder why the homeowners have such a bad doormat.
3. Update The Lights On Your Porch
When it comes to porch lighting, think about how long it's been since you upgraded it, as well as the type of lighting system you have and how cost-effective it is.
The older the system, the more electricity it will use, which is bad for both your wallet and the environment.
Updating your porch lights will improve the appearance of your porch and your overall curb appeal – as well as making it possible to see on your porch at night!
4. The House Numbers
Aside from the home number, what do you think about when you think about how you know you got to someone's house for the first time?
When giving instructions, you usually don't say anything like your house's size or shape; instead, you just give the number.
You can help by having a prettier (perhaps larger) house number on your property, which will also boost your curb appeal.
5. Improve Your Mailbox
Even if your mailbox is in good condition, there's a good chance you can make it more functional and appealing.
Many mailboxes in front of houses do not reflect the likes of the owner or owners, sometimes because they are unaware that a more imaginative mailbox is available.
Of course, if your HOA forbids it, you'll have to make do with what they do permit.
6.Installing Gutters
If your gutter system is old or aging, it may be time to replace it, and the cost is well worth it considering the potential damage that a defective gutter system may cause to your home.
7. Pick Up the Garbage on Your Lawn
It’s inevitable that your lawn will get dirty as time passes by, so it’s very important to maintain its cleanliness.
Cleaning your lawn will cost you nothing, but will definitely improve your home’s curb appeal.
Whatever you find on your lawn, whether it's tree leaves or other lawn garbage, it should be gathered or somehow removed.
If you do it this way, you may improve the curb appeal of your property without spending a lot of money.
If you need professional help with your interior/exterior painting and house washing project, Steves Quality Painting and Washing is here for you.
Our home interior/exterior painting and washing services are available in Green Lake and Princeton, WI.
Call us today at (920) 527-9478 for a FREE painting estimate.
7 Things To Do To Prepare For Ceiling Painting in Princeton, WI
When it comes to updating the decor of your home, you may notice that the ceiling is looking a little old and could benefit from a fresh coat of paint.
A ceiling, like any other wall in your home, needs constant painting to maintain its beauty, even though some people aren't aware of it.
Isn't a ceiling nothing more than a wall above your head?
With that in mind, here are 7 Things To Do To Prepare For Ceiling Painting in Princeton, WI.
1. Remove All of The Furniture
You'd be accurate if you wondered how the furniture in the room being painted connects to the ceiling being painted.
You want as few obstructions as possible when painting the ceiling, which includes any furniture that could cause you to trip.
If that isn't possible, move the furniture to the center of the room and cover it with a drop cloth before you begin painting to protect it from paint splashes.
2. Pick Your Paint Carefully
When painting your ceiling, you don't want to use just any paint because not all paint is created equal.
There are numerous paints specifically designed for painting ceilings that have advantages such as less drip, which is a plus.
Given the tendency for paint to fall downhill due to gravity, this is a positive thing.
Keep in mind that you want a ceiling paint that won't peel or split easily when making your selection.
3. Pick A Color
You could go with a plain white or even an eggshell hue, but why limit yourself when your ceiling can be painted in practically any color you desire as long as it meets your tastes?
The only restriction on the color of your ceiling is your own personal preference; don't let others tell you that you can't have a certain hue because they find it unappealing.
4. Get the Room Ready
The simplest approach to prepare a room for painting is to consider whatever you don't want to be painted over and then remove or cover it with a drop cloth.
For example, when you move around and travel from place to place, the floor should be covered with a heavier drop cloth so that you don't mistakenly remove it and expose the floor to the dripping paint.
Light switch and electrical outlet covers, for example, can be removed and replaced with painter's tape for the duration of the painting operation.
5. Hide Flaws with a Stain-blocking Primer
Roof leaks, overflowing sinks, cigarette smoke, and large spills can all leave unsightly stains or dinginess on the ceiling that no amount of paint can cover.
Applying a coat of stain-blocking primer to the stain can solve your problems.
White pigmented shellac is the typical choice.
Spray cans of colored shellac are available, but it's usually quicker to apply with a brush.
Make sure you have some ammonia or denatured alcohol on hand to clean your brush.
If you're painting over a yellowed ceiling caused by smoke, apply a coat of shellac to the entire ceiling before applying latex paint.
6. Prepare the Surface for Painting by Sanding It
Bumps and grime can form on the ceiling as the layers of paint pile up.
A fast once-over sanding with 100-grit drywall sanding paper on untextured ceilings is an excellent place to start.
This improves paint adherence and produces a flawless finish.
A sanding pole is the most practical tool for this.
After you've finished sanding, wipe the dust off the ceiling using a damp sponge.
7. Get the Ceiling Ready
The final step in the painting preparation process is to prepare the ceiling.
This entails washing the ceiling completely and ensuring that it is as smooth as possible before beginning the painting process, which may include minor sanding to make it even smoother.
If you don't have the paint on hand yet, estimate how much you'll need before buying it to prevent buying too much.
If you need professional help with your interior/exterior painting and house washing project, Steves Quality Painting and Washing is here for you.
Our home interior/exterior painting and washing services are available in Green Lake and Princeton, WI.
Call us today at (920) 527-9478 for a FREE painting estimate.

7 Tips For Choosing Paint For Your Bathroom in Princeton, WI
Painting is one option to consider when it comes to improving or changing the aesthetic of your bathroom.
Because a bathroom differs from other rooms in your house in a variety of ways, choosing paint for it is different from choosing paint for other rooms.
With that in mind, here are 7 Tips For Choosing Paint For Your Bathroom in Princeton, WI.
1. Don’t Forget About The Mold
Consider the function of the paint you're going to use when painting your bathroom.
With the exception of the kitchen, your bathroom will have substantially more moisture in the air than any other room in your house.
Mold and mildew-resistant paints, which are available in a variety of hues, should be considered as a result.
2. Determine How Much Wall Space You Have Before You Begin Painting
Calculating your wall space is one of the first and most important things you can do when painting your bathroom.
This is important for a variety of reasons -- to begin, figure out how much paint you'll need for the project; too much paint will just sit in your storage bin, unused.
Second, knowing how much you'll end up painting is crucial since knowing how much you'll end up painting allows you to estimate how long it'll take you to complete the task and so create a painting project plan.
3. Allow Light To Enter
The amount of light that enters the bathroom, particularly the amount of light that enters the bathroom, has a big influence on how colors seem in the area.
The darker the hues you can choose, the more natural light you have.
If your bathroom, on the other hand, receives little natural light, utilize brighter colors to improve the overall appearance.
4. Take the Floor Into Consideration
When it comes to choosing the appropriate color for your bathroom while painting, the floor is a great place to start.
Make sure the color matches the floor because the contrast will be evident in your daily use of the bathroom.
Applying a small sample to the wall and allowing it to dry is the simplest approach for evaluating which color will compliment your floor.
Instead of guessing how it might appear based on paint samples, you'll be able to see how it looks in real life.
5. Check The Most Recent Fashion Trend
As bizarre as it may sound, one thing to consider is what the pros in the area use while painting the bathroom.
This might include anyone from architects to interior designers who choose paint colors for restrooms.
It's worth noting that a color that's popular for bathroom painting is usually because it looks good in a variety of lighting conditions, including the harsh artificial lighting seen in restrooms.
6. Make Use of The Color Wheel
Many people are hesitant when it comes to bathroom color schemes.
Color mismatches are accentuated because there is typically a paucity of space.
Use the color wheel to make things easier.
The color wheel, which has been around for millennia and has been utilized in design, allows you to quickly observe how colors interact with one another.
Complimentary colors, such as red and green, are diametrically opposed, whereas complementary colors, such as green and blue, blend.
Experiment with several combinations until you find the one that best suits your needs.
7. Maintain A Neutral Tone
There's a reason why neutral bathrooms are so popular.
Colors can now generate feelings of serenity and tranquility thanks to them.
They can, however, grow tedious after a while.
To break it up, combine two different neutrals.
Grey and white in darker tones, as well as beige and brown, are encouraged.
Because double-neutrals are timeless, this is a great way to ensure that your bathroom is ready for the future.
If you need professional help with your interior/exterior painting and house washing project, Steves Quality Painting and Washing is here for you.
Our home interior/exterior painting and washing services are available in Green Lake and Princeton, WI.
Call us today at (920) 527-9478 for a FREE painting estimate.

7 Creative Designs For Your Kid's Bedroom Ceiling in Princeton, WI
Can you envision what a child's bedroom ceiling might seem like if you closed your eyes and tried to imagine it?
Chances are, you're thinking of a white or similar basic solid hue that is dull like that.
We're here to tell you that you don't have to be limited in your imagination when it comes to designing your child's ceiling, and that you don't have to settle for a boring ceiling.
With that in mind, here are 7 Creative Designs For Your Kid's Bedroom Ceiling in Princeton, WI.
1. Tic Tac Toe-Inspired Ceiling
When your child or youngsters look up at the ceiling, they will notice a tic tac toe board as well as the game's rules for those who are unaware.
Of course, having the kids draw on the ceiling isn't realistic, so it'll have to be a mental game, but it could inspire a game on paper or chalkboard.
Include expressions like "Game on!" and other game-related terms if possible.
2. Geometrical Patterns
Even if they are years away from studying the subject in school, children can enjoy seeing geometric shapes on their ceilings.
They can either have only the shapes in various colors (primary may be a preferable option for younger children to learn about them) or merely the shapes with their names printed alongside them.
Having these graphics on the ceiling will, in any event, educate your youngster or children a lot about shapes.
3. It’s All About Birds
Birds exist in a range of shapes and sizes, and they can be among the most gorgeous flight-bound animals you'll ever see.
You can either paint birds on your child's ceiling or purchase specifically created bird decals that can be placed on the wall.
Of course, if you go that way, you'll want to make sure they're flying to make it more realistic — after all, who wants a duck sitting on their ceiling?
4. Characters From Their Favorite Video Games
If you were a video game player as a youngster (and perhaps still are! ), video game characters may be the ones that your children love and admire now, or the ones that you grew up idolizing.
Whether you have older or modern video game characters, they will look great on your child's room ceiling.
Adding their favorite video game character in their ceiling can also calm their minds especially when they’re about to sleep.
5. Ceiling Space in Your Child's Room
What child doesn't appreciate the concept of going into space?
If your child's room doesn't have one, you might want to consider installing a space-themed ceiling.
If your child or children are attracted by the idea of space travel, you can make the room more appealing by painting simple stars or even planets on the ceiling.
6. Chameleons in Different Colors
When you think of chameleons, you generally think of a lizard that can blend in with its environment, yet this isn't always the case.
Hang a range of colored chameleons from your ceiling instead; they'll still look great.
This may also trigger your child’s enthusiasm over animals -- which is good especially that they’re growing up.
7. Lines That Are Perfectly Straight
Finally, just because you're decorating your child's ceiling doesn't mean you have to employ certain designs; plain lines, for example, will still look acceptable.
Depending on how you want the ceiling to look, these solid lines can be the same color or a variety of hues.
Whatever choice you choose, make sure you get the full agreement of the child or children who will be sleeping there at night!
If you need professional help with your interior/exterior painting and house washing project, Steves Quality Painting and Washing is here for you.
Our home interior/exterior painting and washing services are available in Green Lake and Princeton, WI.
Call us today at (920) 527-9478 for a FREE painting estimate.
7 Mistakes To Avoid When Painting Your Dining Room in Princeton, WI
If you have plans in your mind to do some renovations or remodeling to your dining area, painting can be one of your options.
However, although painting is one of the cheapest ways to modernize the appearance of your dining area, proper information is a must to avoid mistakes.
With that being said, here are the 7 Mistakes To Avoid When Painting Your Dining Room in Princeton, WI.
1. Neglecting The Preparation And Planning Part
One of the common misconceptions of many when having DIY is that planning and preparation are not so important.
Planning and preparing before your painting project is very important so you will not be interrupted in the middle of your work.
Not planning can make your work disorganized and unsystematic that can have a huge impact on your result.
Moreover, preparation involves gathering all the needed materials for painting ahead of time and managing your time.
2. Disregarding Cleaning
Before your painting starts make sure to clean all the surfaces of your walls and ceilings, so you will guarantee an even and smooth finish.
In cleaning the surfaces of the walls, you may use bleach solution so you will not exert too much effort in scrubbing dirt and grimes.
Moreover, don’t forget to check for any damages or stains on the surfaces, so you can repair them in advance.
3. Letting The Materials Exposed In Painting
Paint splash or drips is a natural part of the painting process, so leaving the materials exposed can ruin your furniture or floors.
That’s why you need to protect them using drop cloths or plastic sheets, but if you don’t have one old newspaper or carton maybe use in covering them.
4. Using Incorrect Primer
You have to remember that not all primers are the same, there are various formulations of primer depending on the surface.
That’s why it’s very vital to determine the right type of primer for your walls, so you can take full advantage of the benefits it can offer.
Moreover, using the right primers guarantees a smooth and consistent surface especially if your walls are not painted yet.
Also, it greatly works by sealing the original material and can help to perfectly hide impurities in your walls and ceilings.
In addition, it can improve paint bond making it more heavy-duty in damaging factors such as flaking and paint peeling.
5. Not Considering Color Effects
Although, in DIY projects you have the right and freedom to choose what color you want to apply to your walls.
However, you have to bear in mind that colors can influence and stimulate our mood, feelings, and even our appetite.
If you want a more lively and happy ambiance, you may choose from red, orange, yellow, and green shades.
6. Improper Order Of Painting
Most of you may think that you can paint whatever part of your dining room, but that is a common mistake that many are making.
You have to be reminded that the proper order of painting is from top to side, meaning ceilings first the walls.
When you paint the ceilings first you will not worry about the paint dripping or splashes on the walls because you can run them with new paint.
You don’t want to exert double time and effort because you started from walls rather than the ceiling.
7. Coating Over A Wet Surface
In any painting task, coating over a wet surface will not give ample time for the paint to dry out causing shedding and detaching.
That’s why you should be reminded that a proper drying process is essential so your paint will adhere properly and go smoothly.
If you need professional help with your interior/exterior painting and house washing project, Steves Quality Painting and Washing is here for you.
Our home interior/exterior painting and washing services are available in Green Lake and Princeton, WI.
Call us today at (920) 527-9478 for a FREE painting estimate.

7 Ways To Update The Look Of Your Home's Interior On A Budget in Princeton, WI
Do you want to update the look of your homes’ interior but don’t have enough budget to make one?
Fortunately, there are varied ways to enhance and beautify the interior of your home without spending too much money!
With that having said, here are the 7 Ways To Update The Look Of Your Home's Interior On A Budget in Princeton, WI.
1. Add Some Fresh Coat Of Paint
If you want to revitalize and add glamour to your home’s interior in a cheaper way, painting it with fresh paint is one of the answers!
Just make sure to choose a paint color that gives complementary effects to your furniture and fixture so it will create balance.
This will give your interior instant beauty and freshness, you may also consider checking the color psychology wheel so you will know the impacts it can offer to your mood and ambiance.
2. Add Beautiful Indoor Plants
Another budget-friendly tip that can instantly create a classy look to your home is by putting some beautiful indoor plants.
This can make your coffee table, bookshelves, and even the bathroom area a spa vibe that will bring you freshness and cleanness.
Also, choosing indoor plants that grow vertically can create an instant artwork to your walls for a fresher and stylish look.
3. Update your Illumination Styles
Proper lighting can create a huge impact on the overall ambiance of the interior of your home.
Also, putting some accent lights can help highlight some architectural features and designs on your walls.
Besides, putting a chandelier can bring instant beauty to the areas of your living room.
You may wonder that chandeliers are expensive, but many markets offer secondhand lighting that are still in good condition.
4. Add Some Fashionable Crown Molding
If you are not happy with the look of your ceiling, crown molding is one of the key answers!
The good news about crown molding is that you don’t need to spend a large amount of money just to modernize your ceilings.
Crown molding is one of the modern ways to make the room look fully furnished and sophisticated.
5. Add Colorful Cushions
If you feel your living area is too dreary, consider adding pillows with lively colors to enhance the interior.
Also, you may try to use different prints and designs on your pillows, just make sure that you will observe balance.
In addition, you can change the pillowcase depending on the season of the year so it will follow the recent trends and be updated.
Nowadays, there are wide-ranging styles, colors, materials, and shapes of pillows that you can choose on.
Just always remember to observe coherence and unity to your furniture and hardware so it will be more attractive and appealing to the eyes.
6. Be Imaginative And Innovative In Your Window Treatment
Another budget-friendly way to make your home’s interior up-to-the-minute and stunning is by adding creative window treatment.
If you are a type of person who loves linen material, you may consider using bold color curtains or have some light-and-dark complementary colors.
Other alternatives for window treatment are putting blinds or rollers for a more simple yet cultured appearance.
7. Put Some Beautiful Rugs
Like bolsters, rugs can add extra vigor and fashion to your home without exerting too much time and effort.
Moreover, they are also very inexpensive, and there are abundant designs and styles to match your mood and your homes’ style.
Also, you can be creative and innovative in the placement style of your rug, you may try the diagonal placing for a more distinct and divergent appearance.
If you need professional help with your interior/exterior painting and house washing project, Steves Quality Painting and Washing is here for you.
Our home interior/exterior painting and washing services are available in Green Lake and Princeton, WI.
Call us today at (920) 527-9478 for a FREE painting estimate.
7 Mistakes To Avoid When Painting Your Kitchen in Green Lake, WI
Painting your kitchen walls can be very satisfying especially when you do the job flawlessly and smoothly.
However, without adequate knowledge and skills, some DIYers tend to make mistakes affecting the overall result.
With that having said, here are the 7 Mistakes To Avoid When Painting Your Kitchen in Green Lake, WI
1. Poor Grounding And Planning
In any painting project, when you lack preparation and planning, you will not have a proper direction to lead your way.
Especially if the job requires careful planning and preparing, just like the kitchen area where there are many factors to consider.
The kitchen is the place where everyone prepares and cooks food, so it is not impossible that grease and grimes are built up.
Cleaning is one of the essential preparatory activities of any painting job, you have to make sure that no remains of dirt will be left behind.
2. Not Clearing The Obstacles On Your Workspace
Clearing all the materials that can cause a delay in the painting process is very important, so you can move with ease and comfort.
One common mistake of many when doing a painting job is leaving materials exposed in the working area.
If removing materials in your area is very impossible, protecting it with damp cloths or plastic sheets may be a very great help.
3. Not Completing The Supplies.
Another mistake of DIYers is that jumping to the painting job without adequate materials and tools beforehand is a must.
But completing the essential tools and materials should be your concern but also considering the quality of it should do.
4. Painting The Walls With Wrong Paint
Paints have different types of consistency and concentration specifically designed for different types of surfaces.
The bathroom and kitchen areas have similarities in terms of environment and atmosphere, they’re both prone to moisture, grease, and humidity.
That’s why the ideal paints to use are semi-gloss paints because the dirt and grimes can be easily cleaned and wiped with water and cloth.
5. Not Considering The Aesthetic Balance
Selecting the color shades to be applied in your kitchen can be very nerve-wracking than painting.
Because you have to remember that there are things you need to consider in choosing one, such as the aesthetic balance and color impact.
If you want to know the different impacts of colors, consider checking color psychology wheels for you to be aware of the effects they can give.
Or if not, the alternative option that you can do is to search or adopt paint ideas found on the websites or brochures.
6. Skipping Priming
Although not all faces need priming if your walls have previous paint the condition is too unpleasant, priming is highly advised.
Also, the same with unpainted walls priming should be the very first thing you should do because it ensures that your final output will be flawless and smooth.
Moreover, primer helps the paint to adhere properly making it very durable and long-lasting to any damaging effects.
7. Over Or Under Calculations Of Paints
It will be very maddening to stop in the middle of your work because your paint is running low and empty.
The same feeling when you buy too much paint because you over-estimated the paint you should be needing.
That’s why you should have enough knowledge in dealing with this kind of problem, you need to know that a gallon of paint typically covers 400 square feet.
Or if you’re uncertain, you may ask help from any expert dealers of paint so you will not likely waste time, money, and effort in the long run.
If you need professional help with your interior/exterior painting and house washing project, Steves Quality Painting and Washing is here for you.
Our home interior/exterior painting and washing services are available in Green Lake and Princeton, WI.
Call us today at (920) 527-9478 for a FREE painting estimate.
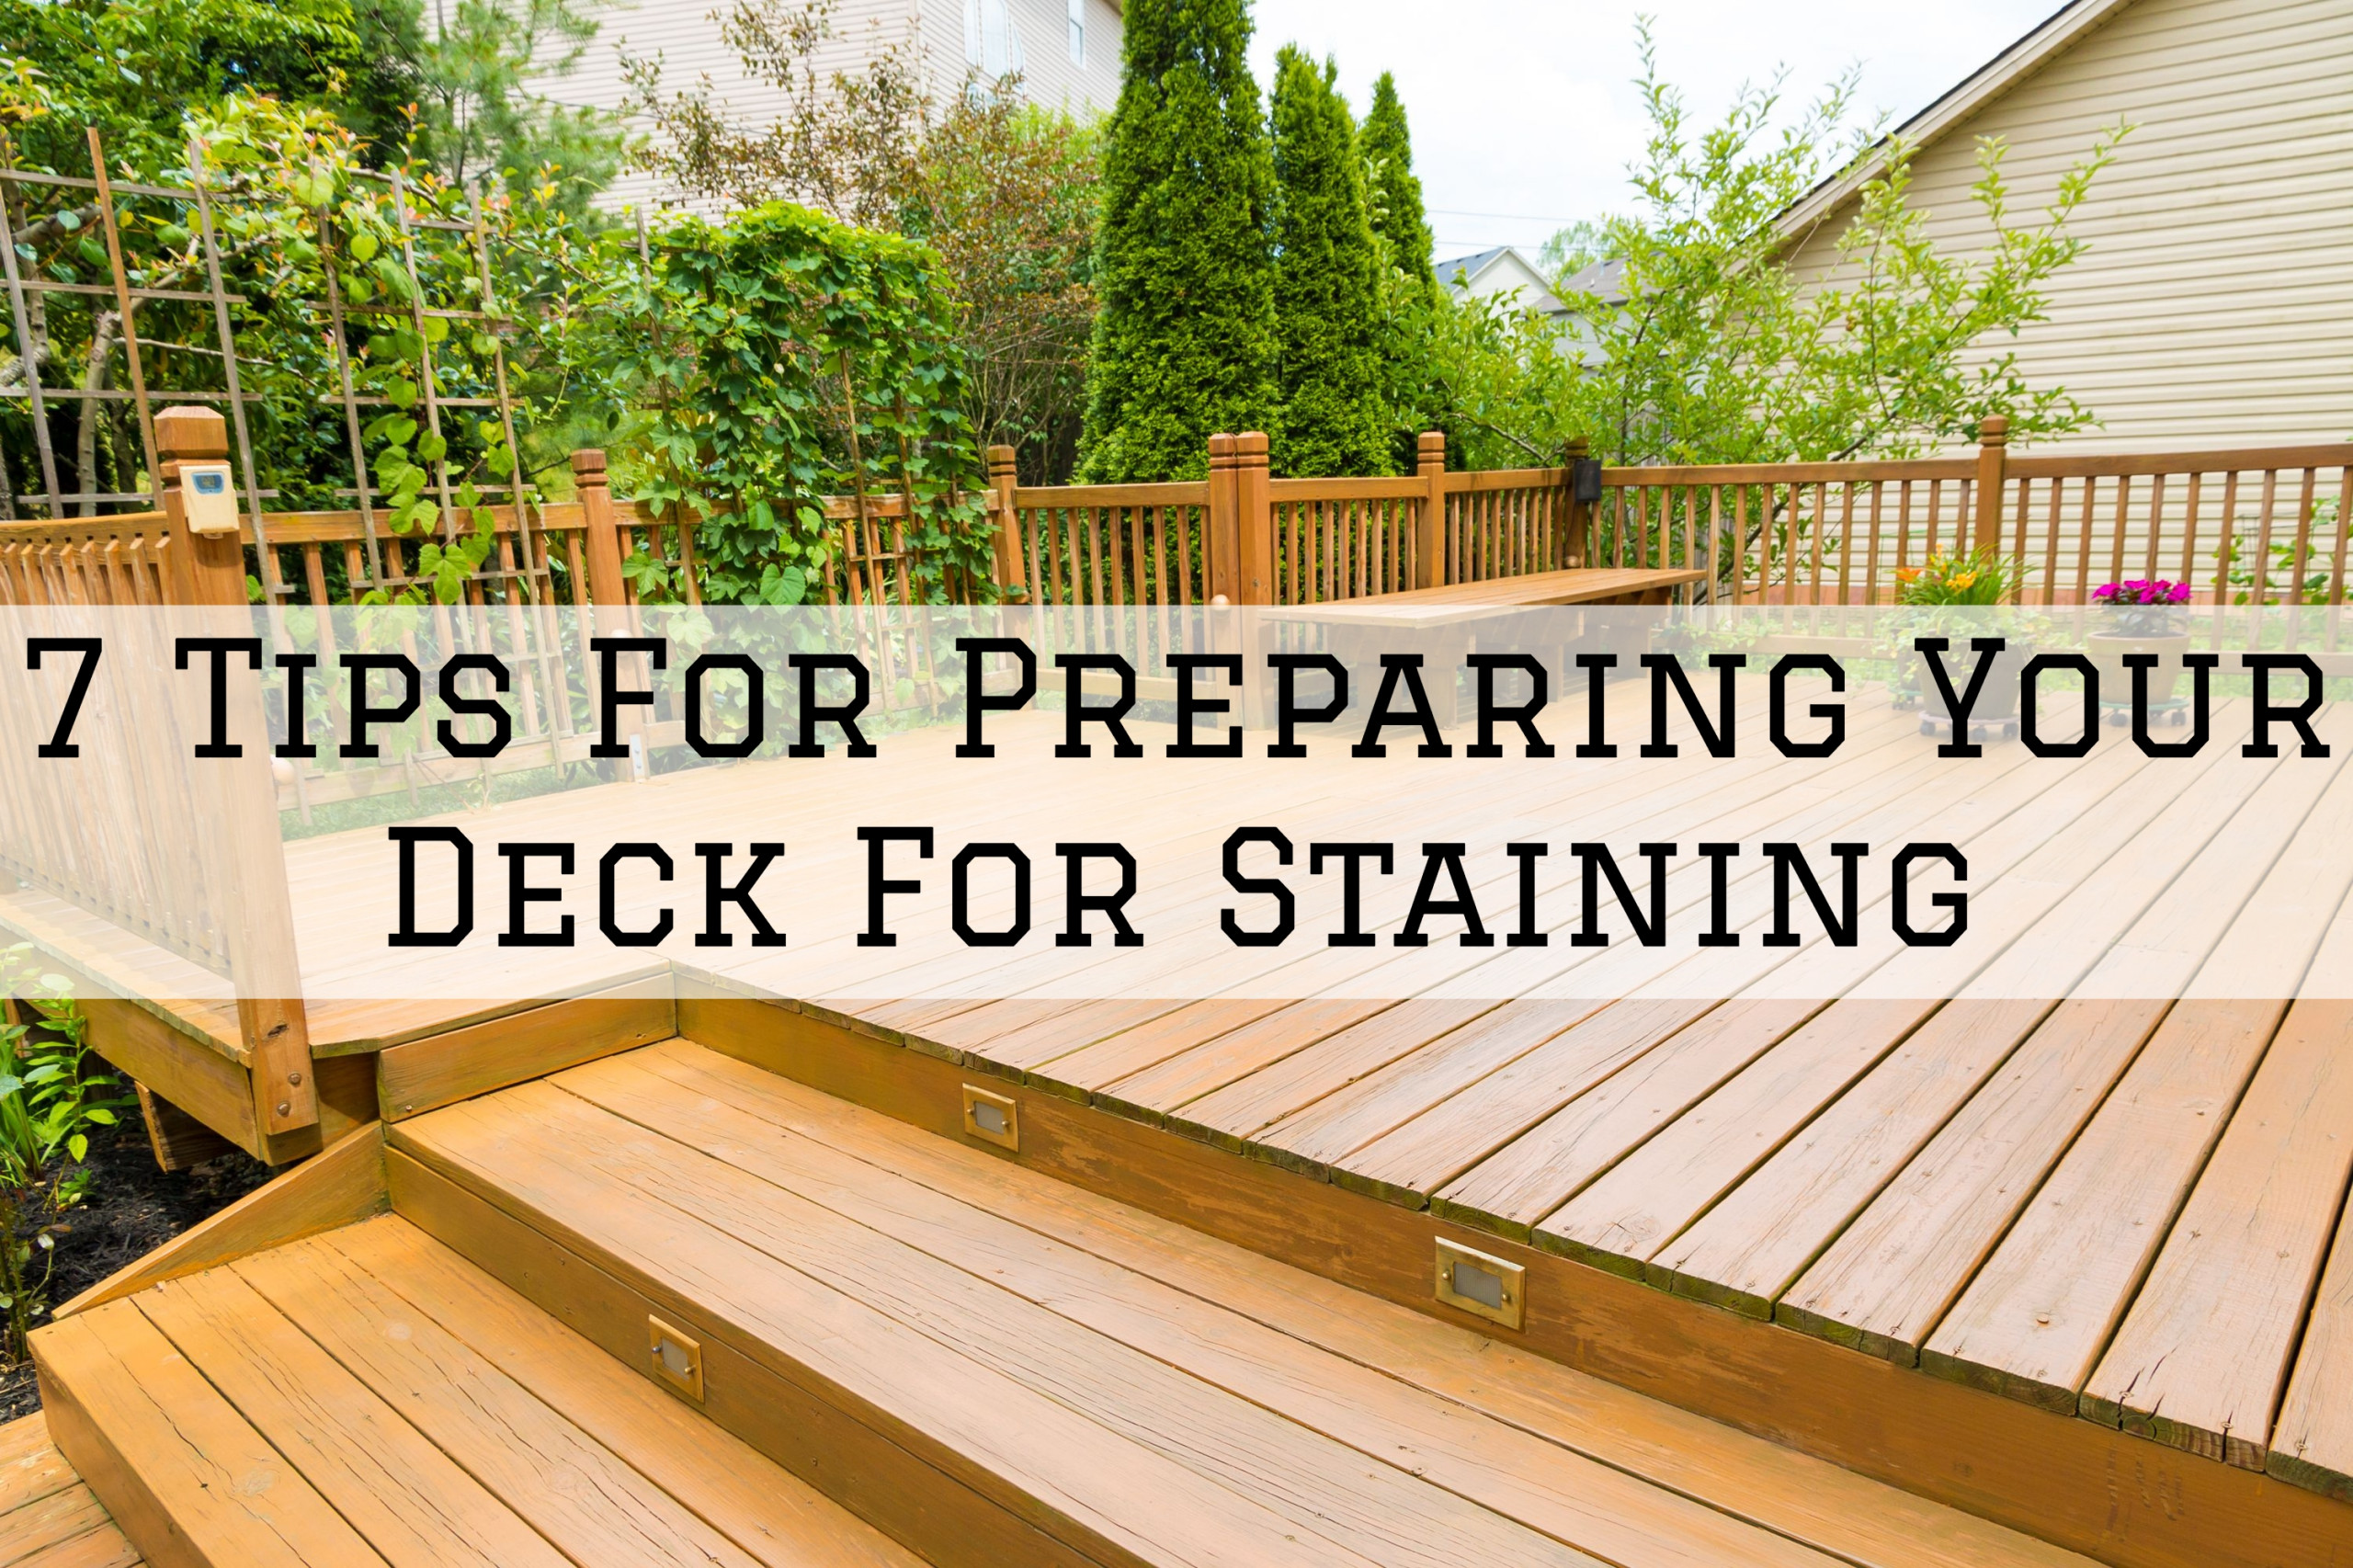
7 Tips For Preparing Your Deck For Staining in Green Lake, WI
A deck can be a perfect investment for your home because it provides your family a great space for bonding creating a memorable experience.
Staining your decks is one of the innovative ways to boost their appearance and maintain their look as good as the day your first had it built.
With that being mind, here are the 7 Tips For Preparing Your Deck For Staining in Green Lake, WI.
1. Make Sure To Prepare Your Decks For Staining
Just like other DIY projects, staining requires preparation and planning beforehand, this is to ensure that you will do it rightly and properly.
To be able to prepare your decks for staining, it is very essential to thoroughly clean all woods whether it is brand new or older ones.
Because when the woods are left uncleaned, the stain will not properly infiltrate into the wood pores making it prone to damages.
One of the best ways to clean your deck is using oxygen bleach which is very effective in cleaning and removing dirt and grime as well as being safe for you.
2. Check For Any Reparations
Before you advance with the staining process, it’s important to check for any parts of the decks that need to be repaired.
You may check for loose nails and screws, or some damages in the wood, if so, make the necessary repairs so it will not interrupt your work.
3. Use A Brightener
One of the best and effective steps for staining is using a brightener which greatly works by opening up the surface of the wood to improve penetration.
Also, brighteners neutralize any stain strippers and restore the appearance of the wood-like the decks.
Wood brighteners are very easy to apply, you will only use a spray and let it sink for a few minutes then wash it off.
4. Use Graded A Products
If you want to ensure that your result will be long-lasting and effective, choose premium products for your decks.
You may wonder that using premium products is costly but you will soon be surprised that choosing quality material is the best choice to make.
Moreover, you may seek help from professional dealers or stores which stain products are the best for decks.
5. Protect Other Materials On Your Working Area
In a staining project, it is a must that you protect other materials that are not involved with your work.
Make sure to cover the home’s siding, aluminum spindles, and around doors so it will not be ruined by a stain.
6. Don’t Forget The Paint Brush On Your Tools
There are diverse ways to spread over stains, such as a pump-up garden sprayer and roller may do.
But irrespective of how you apply your wood stain, always keep a paintbrush on your hand as it can greatly help in the staining process.
A paintbrush works by letting the stain penetrate deep into the pores of a board, causing the wood to absorb more stain.
That’s why when you’re using a spray or roller, don’t forget to back-brush for better penetration into the wood.
Also, always remember to follow the manufacturer’s directions so you will know the dos and don’ts of stain application.
7. Give Time For Your Stains To Dry Out
After all your strenuous project of staining, don’t be in a hurry for its result, give it some time to completely dry.
Make sure to let it sit for at least 24 hours before you return all the furniture on your deck so you will not ruin your work.
Also, as much as possible, before you apply stains on your deck, check first the weather updates so your work will not be disturbed and stop.
If you need professional help with your interior/exterior painting and house washing project, Steves Quality Painting and Washing is here for you.
Our home interior/exterior painting and washing services are available in Green Lake and Princeton, WI.
Call us today at (920) 527-9478 for a FREE painting estimate.

7 Tips For Painting Your Living Room in Green Lake, WI
If you’re planning to transform your living room into a modernized one, painting is one of the answers!
However, despite the fact that painting is considered an easy, low-cost fix, it does not derive without some budget and some effort.
So before you start the painting task, make sure you've done your part in knowing the appropriate steps to undertake.
With that having said, here are the 7 Tips For Painting Your Living Room in Green Lake, WI
1. Deciding On What Swatches You Want To Achieve
Deciding on what swatches you want in your living room can be a challenging task because there are lots of shades that can be chosen.
One of the tips in choosing a color especially when you want to make your living room larger is selecting light shades making a space feel open and airy.
While, dark hues tend to captivate light, making rooms look smaller, that’s why deciding quickly can lead to an unhappy ending, and fixing again can be time wasting and tiresome.
So you must consider different factors in deciding colors but the key is to take your time and search for different options.
2. Prep the Walls In Your Living Area
Once you've established a paint color, now is the time to prep and set up the walls for painting.
This involves cleaning, repairing holes and cracks, and polishing any bumps for you to get a smoother result.
Also, not cleaning the walls can affect adhesion so washing and wiping the walls are very essential to remove all the dirt and grime.
3. Prime the Walls
Priming the walls is an essential phase in order to guarantee a smooth, even finish because walls without prime tend to absorb more paint.
Moreover, priming can cover darker paint especially if you want to have a lighter shade on your walls.
Also priming the walls can eliminate some of the issues and guarantee you get the finished creation you want.
4. Gathering All The Materials in One Place
Painting projects require you to gather all the materials such as brushes, rollers, paint trays, cloths, and ladders.
Enlisting all the materials can save you from frustration because you are sure that your supplies are all complete.
Make sure that you enlist all the essential materials because it’s very frustrating that you will stop in the middle of your work.
5. Remove Objects From the Room
In painting any walls of your house, it is very vital to remove as many items as possible, this is for you to work with ease and comfort.
If taking bulky furniture out is not an option, you may remove all the small accessories and decorations in your area.
Also shield all the fixtures using newspapers, rosin papers, or drop cloth including lights, switches, and floorboards.
6. Apply Paint Using W or V technique
One of the best methods in painting is working on the paint in 2 to 3-foot sections and using the "W" or "V" outline.
This painting procedure will give ample time for the paint to fully dry out, but always check if the paint color is even.
7. Calculate How Much Paint You, Will, Need
To know how much paint you will need, the best option is to get the square footage of your walls.
However, it depends if your walls are newly constructed or already painted, bare walls need more paint.
If you have a bare wall, calculate the square footage of each wall then multiply the room height.
But if you are not sure about this method, the best thing to do is to ask professional dealers of paint.
If you need professional help with your interior/exterior painting and house washing project, Steves Quality Painting and Washing is here for you.
Our home interior/exterior painting and washing services are available in Green Lake and Princeton, WI.
Call us today at (920) 527-9478 for a FREE painting estimate.
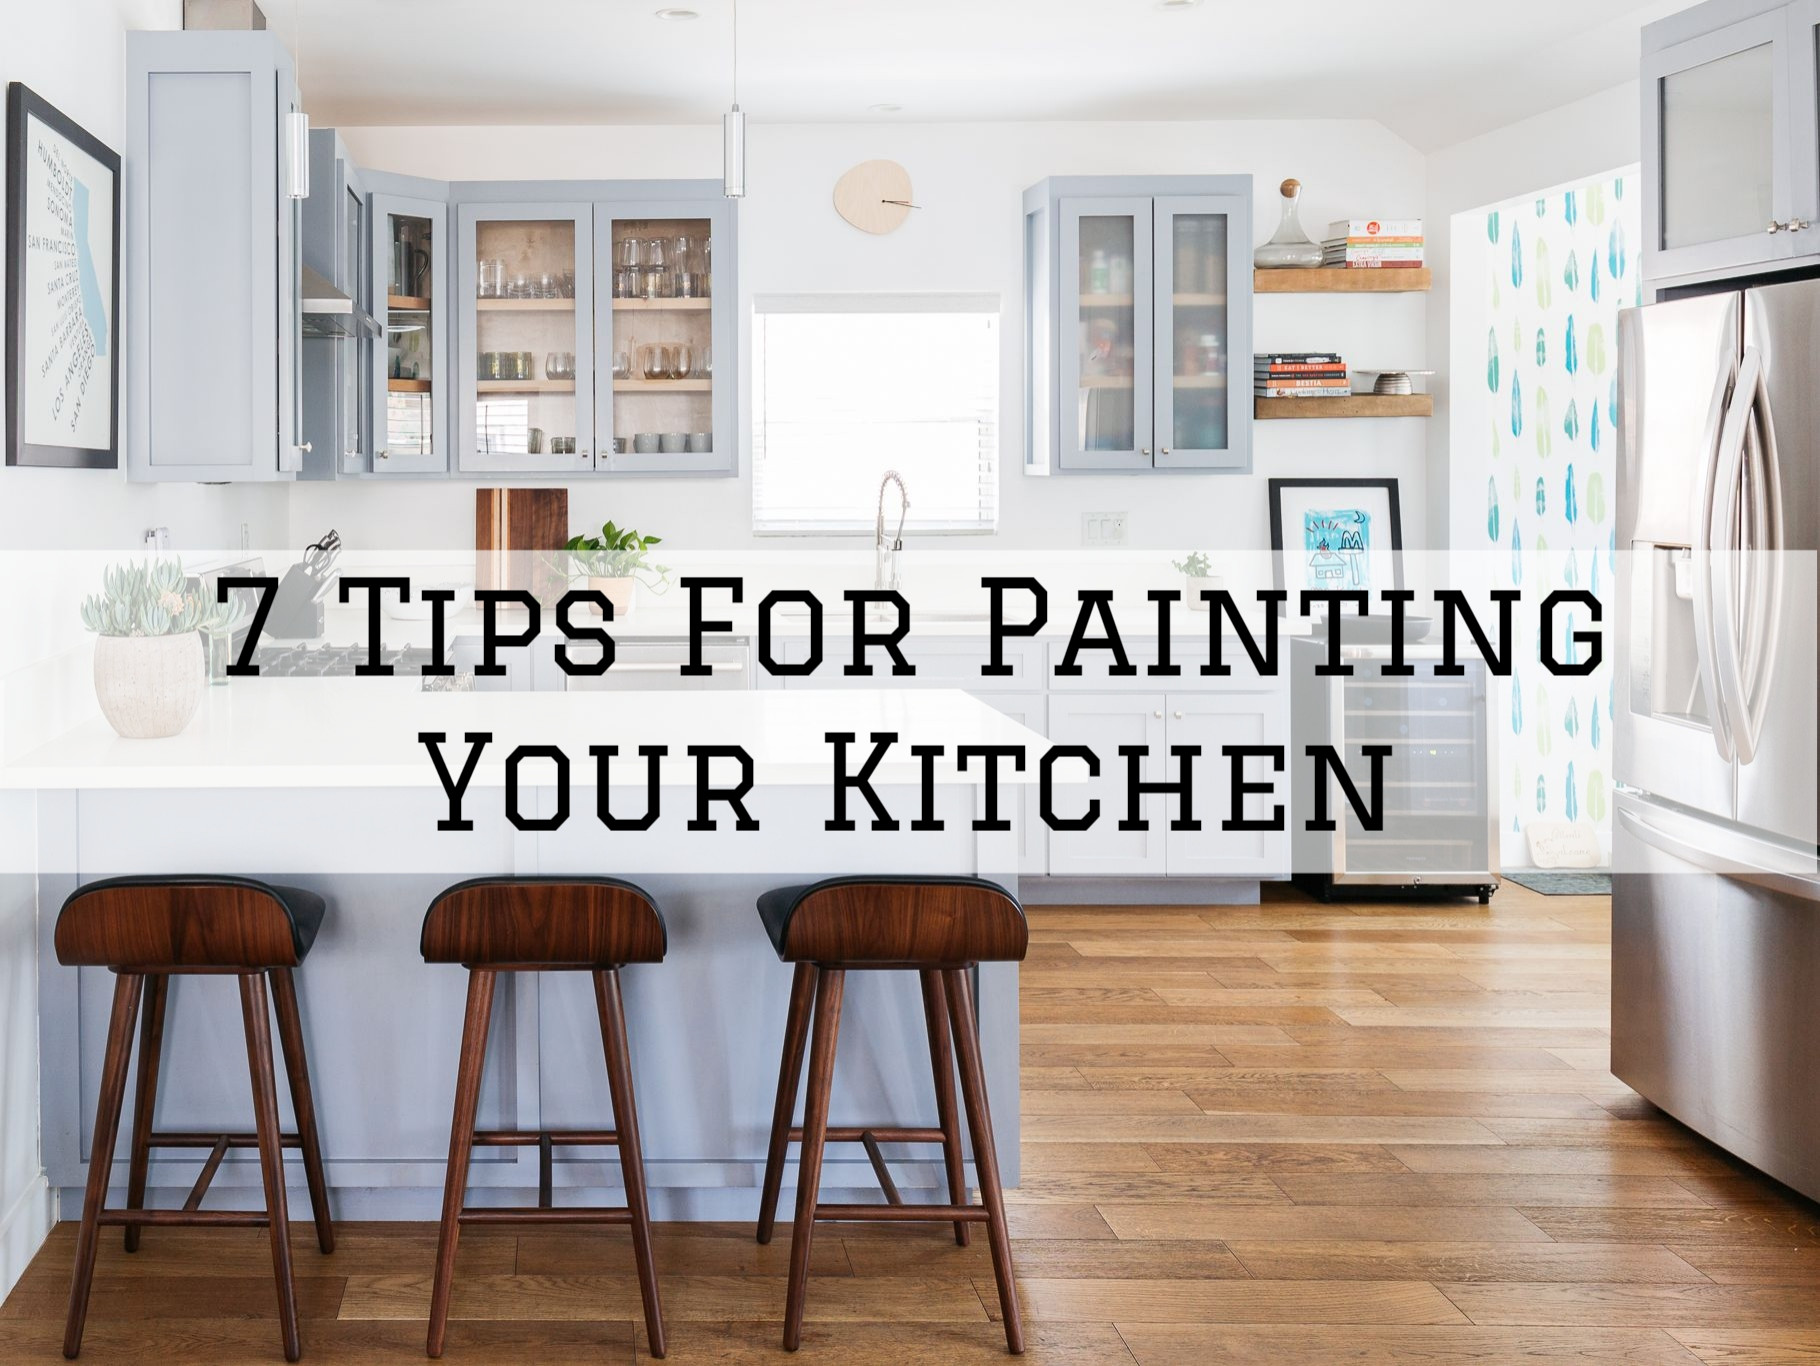
7 Tips For Painting Your Kitchen in Princeton, WI
Painting the kitchen will give it modernized energy making it more attractive and appealing to one’s eye.
Most of a kitchen's wall areas are highly dominated by drawers and cabinets, however, the small space that remains to be painted usually needs a thorough cleaning and extensive prep work.
Having said, here are the 7 Tips For Painting Your Kitchen in Princeton, WI
1. Select The Right Paint And Sheen.
Because our kitchen is used for the preparation of food, the kitchen walls are more prone to grease and grimes.
With this kind of environment selecting the right paint and sheen is essential, you need to choose sheens that can be easily clean such as semi-gloss and satin finish.
Likewise with selecting paints, you must consider hues that impact one’s appetite and mood because the kitchen is where you prepare food and cook.
Allow some time to do research especially on color psychology, you will have a clearer idea of how colors affect moods and feelings.
2. Make A List Of Your Needed Supplies
Before you start with your painting job, make sure that you enlist all the necessary materials so you will not stop in the middle of your work.
Making a list of your needed supplies will ensure that the materials in your project will be complete.
But listing the supplies will not be complete if you don’t choose tools of high quality, so make sure that you buy the right paints, primers, brushes, and rollers.
Moreover, prepare equipment like ladders and extenders to efficiently reach higher areas and for you to avoid future accidents.
3. Clean All The Zones To Be Painted
Because our kitchen is the area where we always got messy, there is no wonder that dirt, grease, and grimes are everywhere.
That’s why, before you proceed with your painting, make sure that you clean extensively all the portions to be painted.
To guarantee that you will completely clean the walls, use a vacuum cleaner and solutions.
Also, don’t forget to repair when you see any damages such as holes, dents, or cracks.
4. Get rid of Obstacles In The Area
If you want to work efficiently in your kitchen space, make sure to get rid of all the obstacles in your way.
If you can move them to safer parts of your house, please do, but if you don’t, cover them with plastics or drop cloth will do.
Also protect all the fixtures such as lights, switches, floorings, and cabinets with newspapers or rosin papers.
5. Don’t Forget To Prime
In a kitchen environment where moist and different substances can damage surfaces of the walls, it is a must that you do the priming.
But always remember that not all faces are required to be prime, if your kitchen walls are in a good state there is no need to have one!
6. Calculate How Paint You Needed
To be able to calculate how much paint you will be needing, determining the square footage of your walls will help.
If your kitchen is newly constructed more paint is needed make sure to calculate the square footage of each wall then multiply the room height.
But if you don’t have any idea about this kind of technique, you may ask for help from professional dealers of paint.
7. Apply Coat More Than Once
If you want to make your painting more distinct and finish, coating once is not enough.
Applying multiple coats can make your finish smoother and evener and at the same time long-lasting.
Just don’t forget to let the first coating completely dry before re-painting so you will get a flatter result.
If you need professional help with your interior/exterior painting and house washing project, Steves Quality Painting and Washing is here for you.
Our home interior/exterior painting and washing services are available in Green Lake and Princeton, WI.
Call us today at (920) 527-9478 for a FREE painting estimate.
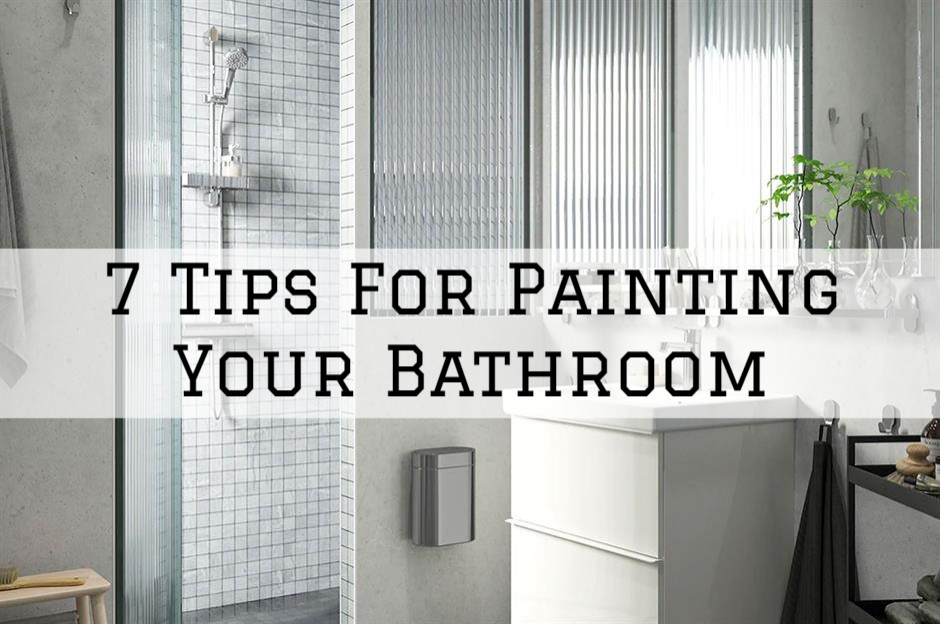
7 Tips For Painting Your Bathroom in Princeton, WI
Your bathrooms are one of the most used areas at your home but are sometimes considered the least priority.
Well, you should change that perspective! The bathroom should always receive proper maintenance and care.
Giving it a new paint can freshen up and modernize its appearance making it more comfortable and relaxed.
However, if you’re planning to have DIY, you should know the different things to consider so you will produce pro-like results.
With that in mind, here are the 7 Tips For Painting Your Bathroom in Princeton, WI.
1. Plan The Aesthetic Design, Beforehand
One of the very first things to consider to make your project uninterrupted is to plan ahead of time about the color and design of the layout.
You may check for color swatches that are suited for your bathroom style, give yourself enough time to visualize your idea.
Planning is very important especially in painting projects so it will help you to become well directed and guided on your DIY.
2. Collect The Essential Tools And Materials
Next to planning, is collecting essential tools and materials for the project so your work will be stress and hassle-free.
Make sure that you gather appropriate materials such as primer, paints, rollers, and many more required for the project.
Also, make sure that you pick the right paint for the bathroom that can resist water, chemical substances, and moisture.
One of the most recommended types of paints for bathrooms is the semi-gloss and satin formulas because they are uniquely designed to withstand the development of mildew on the paint film.
3. Clean The Surfaces Of The Walls
Before you start with your painting project, make sure that you prep the working area by cleaning the walls and ceilings.
Make sure that you clean and remove the accumulated dirt, grimes, or soaps because if not the paint will be wasted as it will peel over time.
4. Protect Materials Inside Your Bathroom
To be able to protect all the materials inside your bathroom, remove the materials that can obstruct your painting process.
However, not all can be removed so covering it with newspapers or plastics can be a great help so that it will not be ruined.
Moreover, lightings, switches, and sinks should be covered using painter’s tape, same with the floorings.
5. Don’t Forget To Prime
Priming your bathroom walls improves the total finish but you should keep in mind to use the right primer for your bathroom.
.Choose paints and primes that are specifically formulated and engineered for bathrooms which can resist unwanted damages.
Moreover, priming the surfaces can contribute to a flatter finish because it can hide bumps and valleys of walls.
6. It’s Time To Paint!
After priming the surfaces of the walls and ceilings, make sure that you paint not once but do it twice!
The first coating may not be sufficient for your bathroom environment, that’s why applying the second is needed.
Applying a second coat on the walls and ceiling will make it more durable, finished, and refined.
But, keep in mind that you should wait for the first coating to dry before you apply the second one.
The usual waiting time to make it dry is two but it will still depend on the temperature and weather condition.
Leave the fan, door, and window open for air to circulate so the paint will be completely dry.
7. Clean Up The Area
When the paint is completely dry, you can now clean your bathroom and return the materials to their designated places.
Moreover, you may opt to purchase new accessories to make your bathroom more appealing and pleasing.
If you need professional help with your interior/exterior painting and house washing project, Steves Quality Painting and Washing is here for you.
Our home interior/exterior painting and washing services are available in Green Lake and Princeton, WI.
Call us today at (920) 527-9478 for a FREE painting estimate.
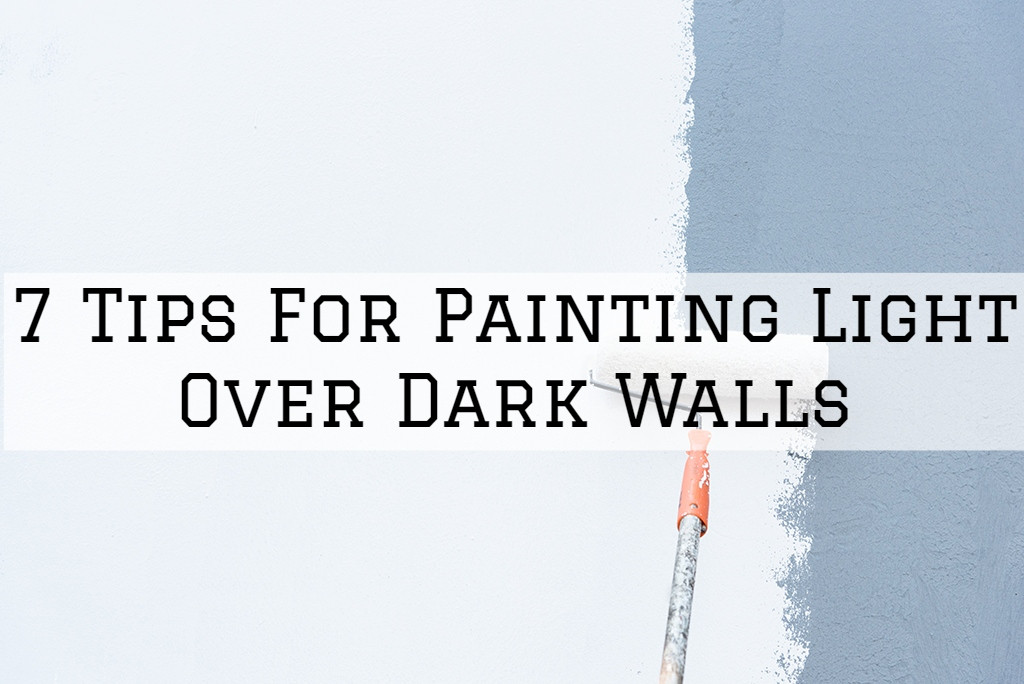
7 Tips For Painting Light Over Dark Walls in Princeton, WI
Are you wondering if you could change the colors of your dark walls and give them a brand new refreshing paint?
Well, it’s very possible! You only need to know the proper ways and knowledge to make it happen!
Here are the 7 Tips For Painting Light Over Dark Walls in Princeton, WI.
1. Start with Collecting The Right Supplies
To start your painting project with no interruption, make sure that you prepare all the essential materials and equipment beforehand.
Start by selecting a roller with the right thickness- the rougher the surface, the thicker your roller should be.
But if your walls are dark but smooth, opt for a thinner nap or a foam roller this can give you smooth coverage.
Moreover, you’ll be needing a primer, paint, a high-graded paintbrush, tape, and roller.
Also, the tools and equipment like a ladder, smoothing paper, a putty knife, and spackling paste are needed to start your day smoothly and efficiently.
2. Prepare The Surfaces
Before you start the project make sure to prepare the surfaces, to coat over a writable surface or any surface with thick coats, sanding first is needed.
Without sanding, the line underneath will still be visible on your wall making it noticeable and waste your makeover.
So what you need to do is clean the surface of your walls first to achieve a smoother paint job.
Moreover, don’t forget to put painter’s tape along the ends between your walls and your ceiling, and the drop cloths to cover your floor.
3. Apply the Right Primer
If you’re planning to change the dark color of your walls to a lighter one, you must apply white primer first.
Because primers come in various colors or shades so it’s very important to check the best primer for darker colors.
Also, make sure to use high-grade primers because they are more capable of masking darker colors.
You may also ask professional paint dealers about what is best for your darker walls.
4. Apply Multiple Coats of Primer
There is a great difference in applying primer for light color walls than darker ones because one coat of prime is not enough for dark surfaces.
You need to apply multiple coats of your primer to reduce the appearance of the previous dark color of the wall.
But you have to make sure that the primer is completely dry before applying a new coat of paint, to give you an evener and smoother result.
5. Make The Coat Thicker and Bolder
Making the coat thicker and bolder will prevent you from adding more paint in the future because less paint will cause the layers of paint too thin.
To get optimum results, you may opt to roll in big “M” or “W” shapes because it gives the paint at least dry for a second rather than immediately covering it up again.
You should bear in mind that when you have darker walls, the more layers or coats you’ll need to cover it up, and the more time you’ll have to spend.
6. Take Its Easy, Don’t Rush
Everything can be done accordingly and successfully at the right time, so be patient and take time with your project.
Patiently waiting on drying up the primer and paint before you apply the next coat is essential.
Acrylic paint typically dries for about 15 - 30minutes -- it depends on the temperature and humidity.
7. Be Creative And Innovative
If simply painting a light color over your dark walls can’t cover it up, you must try and explore new things.
Don’t be helpless! There are so many ways to make your darker walls interesting and perfect!
If you need professional help with your interior/exterior painting and house washing project, Steves Quality Painting and Washing is here for you.
Our home interior/exterior painting and washing services are available in Green Lake and Princeton, WI.
Call us today at (920) 527-9478 for a FREE painting estimate.
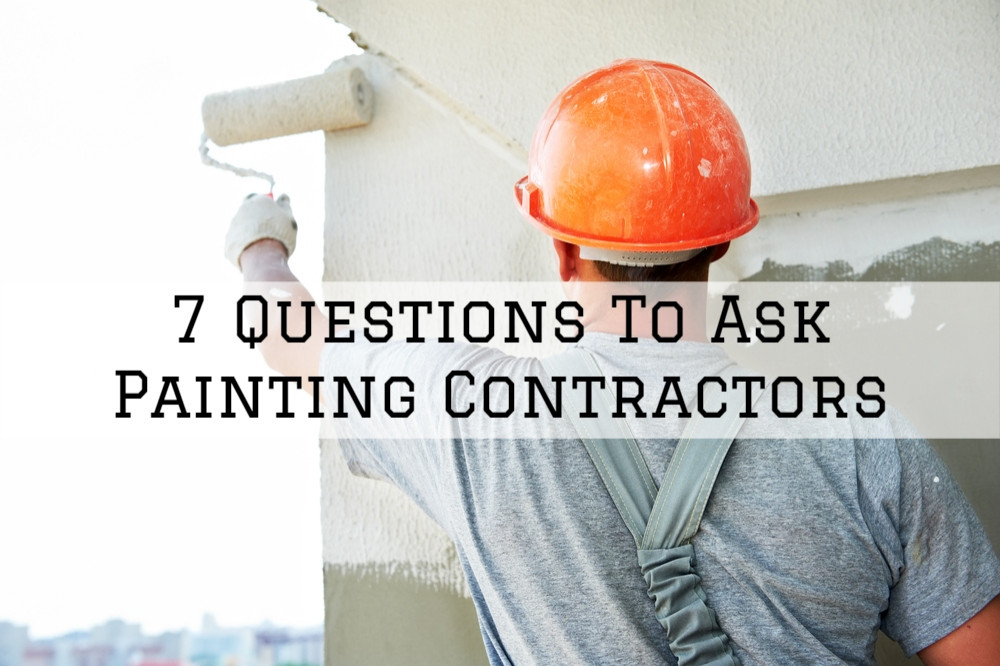
7 Questions To Ask Painting Contractors in Green Lake, WI
Hiring painting contractors can be one of the smartest things to consider when you have plans in upgrading the colors of your home.
Painting contractors have the best skilled and experienced painters to provide the utmost results.
However, finding a reliable one is the wisest decision you can do, because not all contractors are legit and trustworthy!
So here are the 7 Questions To Ask Painting Contractors in Green Lake, WI.
1. Do You Have Insurance?
One of the most important things to ask with painting contractors is the insurance offered by the company.
Every legit contractor should have business liability that protects your property from any damage.
You should look for liability coverage that has a million-dollar limit because it is the minimum limit every contractor should offer.
Another thing that you need to do is to call the insurance carrier to make sure that it is valid and active.
2. Do You Offer Free Estimates?
Asking for free estimates can be a very great help especially if your budget is tight and constricted.
Contracting companies that offer free estimates are A-plus- this will help you to budget the costs ahead of time.
Moreover, make sure that estimates should be done in-home for them to visualize and accurately predict the work, and costs of your project.
3. How Long Is Your Business Operating?
You don’t want to work with painting companies that have little or no experience in the field.
It is still wise that you should pick contracting companies that have been in the business for a long time.
Contractors with 5 years of painting expertise and skill are great because they have experience and have built up a good client base.
But you may opt to choose contracting companies with more than 10 years in service because they are more equipped and skilled with this kind of job.
4. What Kind Of Materials Do You Use?
It’s very imperative that you ask the contracting companies about the materials they are using to ensure the high quality of paint and service.
By asking for details about the products and materials that they are using can give you an idea of legitimacy.
Also, this can help you to assess if the contractor really understands what they are using and why.
5. Do You Have A Website To Check-in?
Having reviews and testimonials on their website is a very great way to ensure that they are trustworthy.
Always remember those good contractors have tons of good reviews about their services, people, and output.
However, if you do not find reviews about the company, requesting their portfolio will do.
Some companies might not bring up-to-date websites, but they’re sure to have credentials of their best work that they can share with you in some format.
6. Do You Have Safety Training With Your Workers?
The company you hire must provide safety training for its employees.
This is important even if the contractor has the proper insurance because accidents are highly disruptive.
You may request for a written safety policy manual and regular safety training documentation to ensure that it truly exists.
7. How Will My Project Be Managed?
Asking the contractor how he or she will manage the project is very vital for you to visualize how this company will work.
Always remember that good project management incorporates the planning, execution, and follow-up of the service you have purchased.
It is important because it will help your painting project run smoothly and successfully.
Moreover, good contractors don’t waste time, they are very specific with their timeline and schedule.
Having a legit contractor provides you the best services and management, so be aware and careful-choose your contractor wisely!
If you need professional help with your interior/exterior painting and house washing project, Steves Quality Painting and Washing is here for you.
Our home interior/exterior painting and washing services are available in Green Lake and Princeton, WI.
Call us today at (920) 527-9478 for a FREE painting estimate.
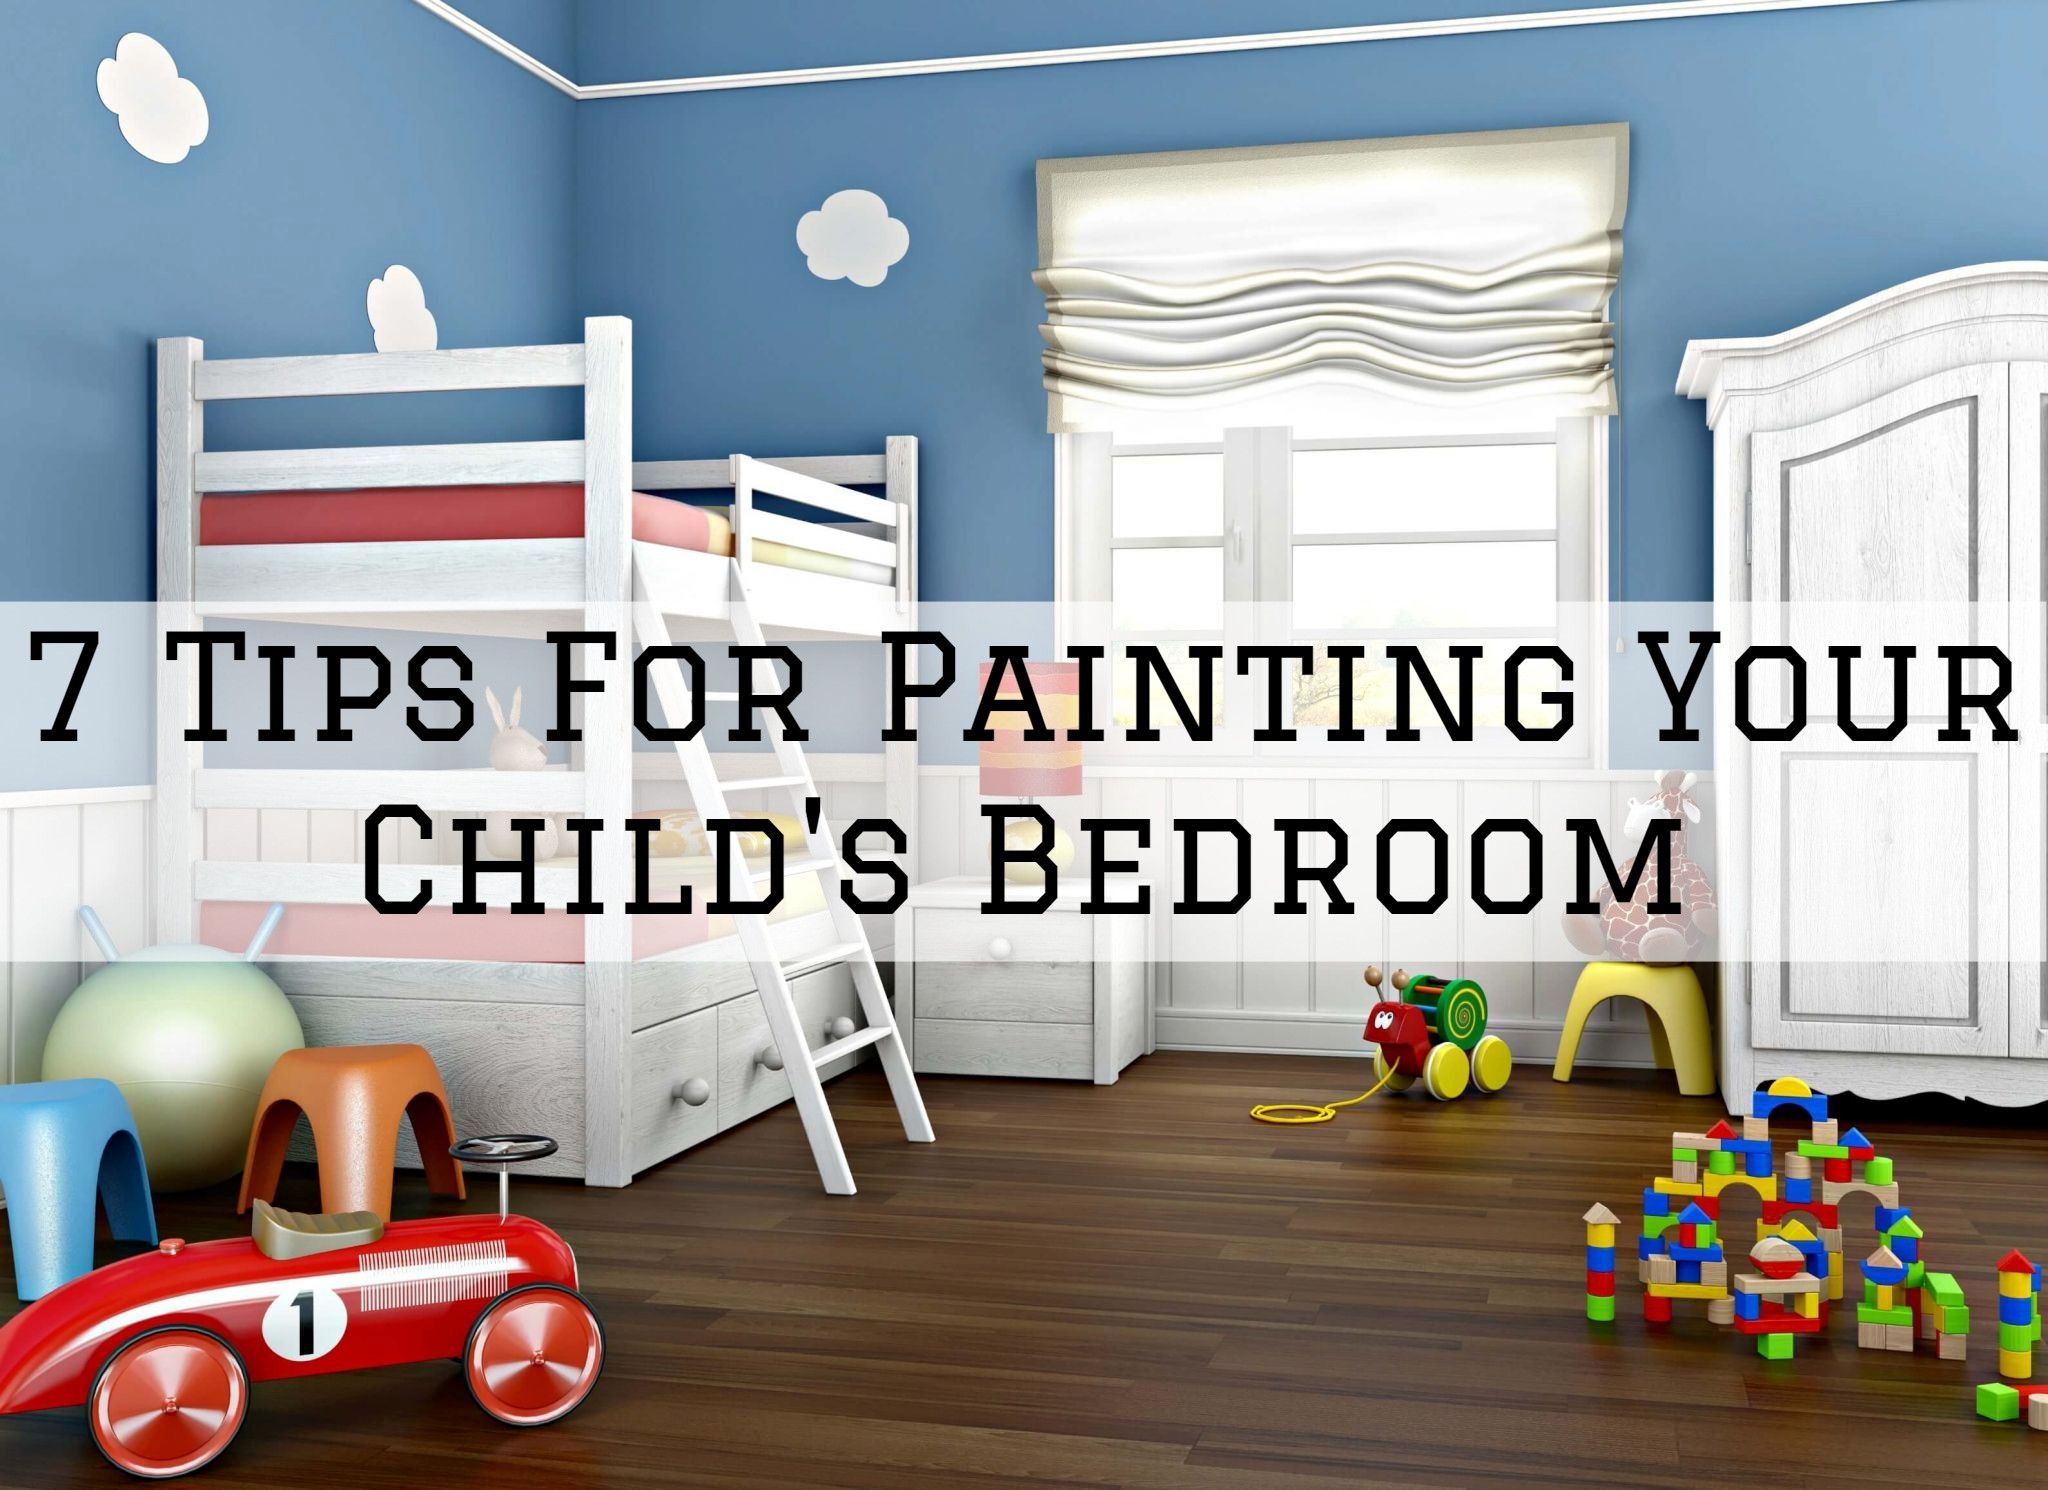
7 Tips For Painting Your Child's Bedroom in Green Lake, WI
As a parent, you want your kids to be comfortable and relaxed with their bedroom by providing appropriate color and design.
Painting your child’s bedroom is one of the most enjoyable bonding moments that you can share with them.
Moreover, paints on the walls can stimulate their imagination and creativity making it more memorable and extraordinary.
Here are the 7 Tips For Painting Your Child's Bedroom in Green Lake, WI.
1. Involve Them In The Project
Making your child involved makes the makeover of their bedroom more sentimental and unforgettable.
Make sure that you ask them about the design and color they want to have on their walls.
If your child is older enough, you may hand the work of painting in them, it is also a great form of family bonding!
2. Choose Suitable Polish
If you have toddlers, you cannot avoid messiness in their room such as sticky fingerprints and drawings on the walls.
The best kinds of paints for these types of problems are satin or semi-gloss.
Satin paint tends to cover imperfections in the wall more than semi-gloss, but semi-gloss is easier to wipe clean.
Semi-gloss texture is providing enough smoothness to make it easier to wipe away fingerprints and other grimes.
Both paints are great options for your child's bedroom because they can be cleaned and washed easily and don't hold stains.
3. Choose Safer Paints
Every parent wants the best for their child, especially their safety and welfare is your priority.
Some paints have volatile organic compounds which release toxins that can risk your child’s health.
So if you’re having DIY, make sure that you ask professional dealers about the safer alternative paints for their bedroom.
If your child is very sensitive to odors, you may opt to choose a paint that is eco-friendly.
Choose paint that is made from natural and organic products which are safer not only for your loved ones but also for the environment.
4. Consider Bright Colors
Younger kids love brighter colors such as reds and oranges because they stimulate their mood and promote concentration.
While light blues and greens have a relaxing effect and are commonly used for bedroom color ideas in general.
However, you may opt to consider choosing a paint color that grows with your kids to avoid repainting it.
So you may consider using neutral colors so it can still apply when they get older.
5. Use Color Combinations
Combining paint colors can make your child’s bedroom lively and attractive because having a colorful corner in their room enhances their creativity.
Paint combinations in the form of stripes rendered in easy-on-the-eye color blends to give kids' bedroom staying power.
Moreover, if you want a dramatic stripe effect, you can go with more than two hues or colors such as a wide green stripe, a narrow pink stripe, and a wide green stripe.
6. Consider Putting Mural Arts
If you are an artist or you have the talent for drawing, mural designs will make your kid’s bedroom state-of-the-art!
Creating a puffy white clouds design on a baby blue ceiling or painting their favorite heroes or characters on the wall can make it more attractive.
Moreover, painting number murals can be your choice because having mural paints makes their bedroom attractive and imaginative.
7. Consider other paint techniques.
If you think applying plain paints is boring, you can try other decorative techniques of painting.
Color washing, sponging, and rag rolling are techniques that can add an interesting look to the walls and ceilings.
Different paint techniques give the room more creative and attractive especially with the perspective of your child.
Don't let them miss their childhood, so let them experience and live with it!
If you need professional help with your interior/exterior painting and house washing project, Steves Quality Painting and Washing is here for you.
Our home interior/exterior painting and washing services are available in Green Lake and Princeton, WI.
Call us today at (920) 527-9478 for a FREE painting estimate.
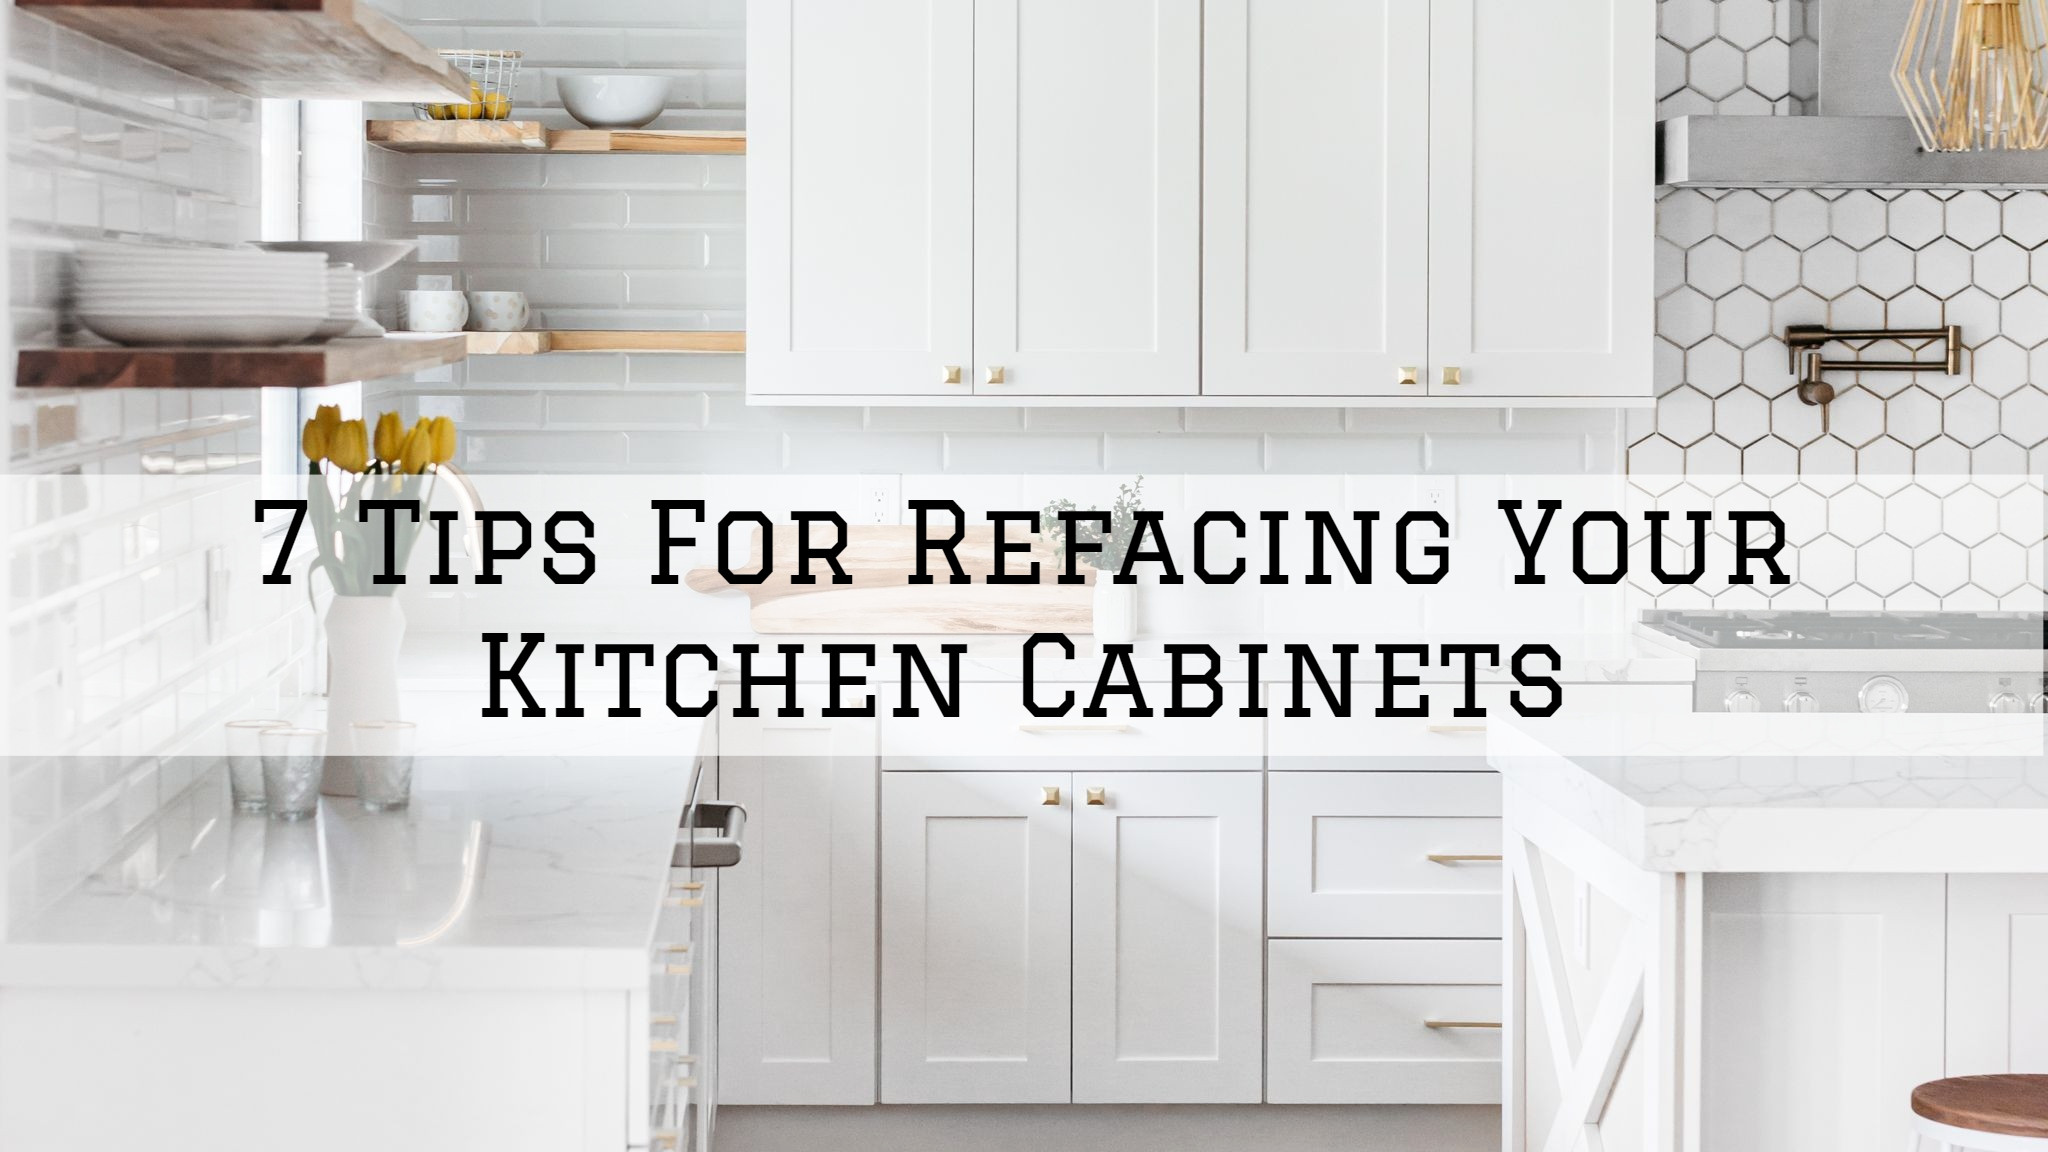
7 Tips For Refacing Your Kitchen Cabinets in Green Lake, WI
Are you tired with the look of your kitchen cabinets and want to give it a full blast makeover and transformation?
Refacing your kitchen cabinet is a great way to transform your dull drawers into modernized and classy ones but in a cheaper way.
Doing this kind of project on your own is possible, just make sure that you have proper knowledge and skills.
So if you’re planning to have one, here are the 7 tips for refacing your kitchen cabinets in Green Lake, WI.
1. Assessing The Condition Of Every Cabinet
Assessing the condition of every kitchen cabinet before refacing is essential, this is for making your project ideal and practical.
Always check for the damages, there are some damages that can be simply repaired by filling dents or gouges but if the case is worse- rethink first.
You don’t want to spend money that sooner will be wasted, so make sure that you inspect every area of your cabinet.
2. Prepare All The Things You Will Be Needing
Every project will go smoothly and successfully if you have with you the essential materials for your job.
In the case of cabinet refacing, the tools you will be needing are screwdrivers for removing the doors, frames, and shelves.
Next is the putty knife for eliminating shelving runners, scraping paints, also the must-haves in cabinet refacing are chisel, hammer, scrapers, etc.
3. Do Some Clean-Up
Your cabinets and drawers may build up dirt, dust, splatters, stains, and pigments over time due to several factors.
So doing clean-up is very essential, this is to make sure that the surfaces are smoothened and refacing-ready.
You may clean your cabinet by wiping the surfaces with a sponge or sanding it so the veneer will stick fully.
Moreover, make sure that you will remove the doors, drawer front, molding, or any objects that will interfere with the refacing process.
4. Measure The Cabinet Precisely
Measuring the correct sizes for new doors, drawers, and end panels is very important in refacing, this is to ensure your new refaced cabinets are seamless and color-matched with your new drawers and doors.
You may use a tape measure to get the width and height of your cabinets and it is recommended that you measure at least twice for a more accurate number to determine the amount of veneer required, and how much hardware is needed.
5. Cover With Veneer
A veneer is a thin material that is used for front frames of all cabinetry, this is used to make the cabinets look like it’s built on wood species.
So covering your cabinets with veneer adds up with the look of your cabinets.
A paper cutter can be used as an alternative tool for cutting the veneer to its proper length.
After cutting you are now ready to install these veneers in vertical position (stiles), and in horizontal directions (rails) then press them using a veneer tool to ensure a good bond.
6. Install New Hardware
Refacing kitchen cabinets will not be complete until you replace them with new hardware.
There are several styles you can choose to customize the knobs and hinges of your cabinets.
Moreover, you may also choose from standard and recent designs in black, white, chrome, nickel, bronze, and gold finishes depending on the style you want to achieve.
7. Invest Sufficient Time For Your Project
Doing refacing projects cannot be done quickly and rapidly, it requires enough time, effort to get a picture-perfect result.
Moreover, refacing should be planned ahead of time especially on the style you want to achieve by making sure of the quality of the materials used in the refacing process.
If you need professional help with your interior/exterior painting and house washing project, Steves Quality Painting and Washing is here for you.
Our home interior/exterior painting and washing services are available in Green Lake and Princeton, WI.
Call us today at (920) 527-9478 for a FREE painting estimate.
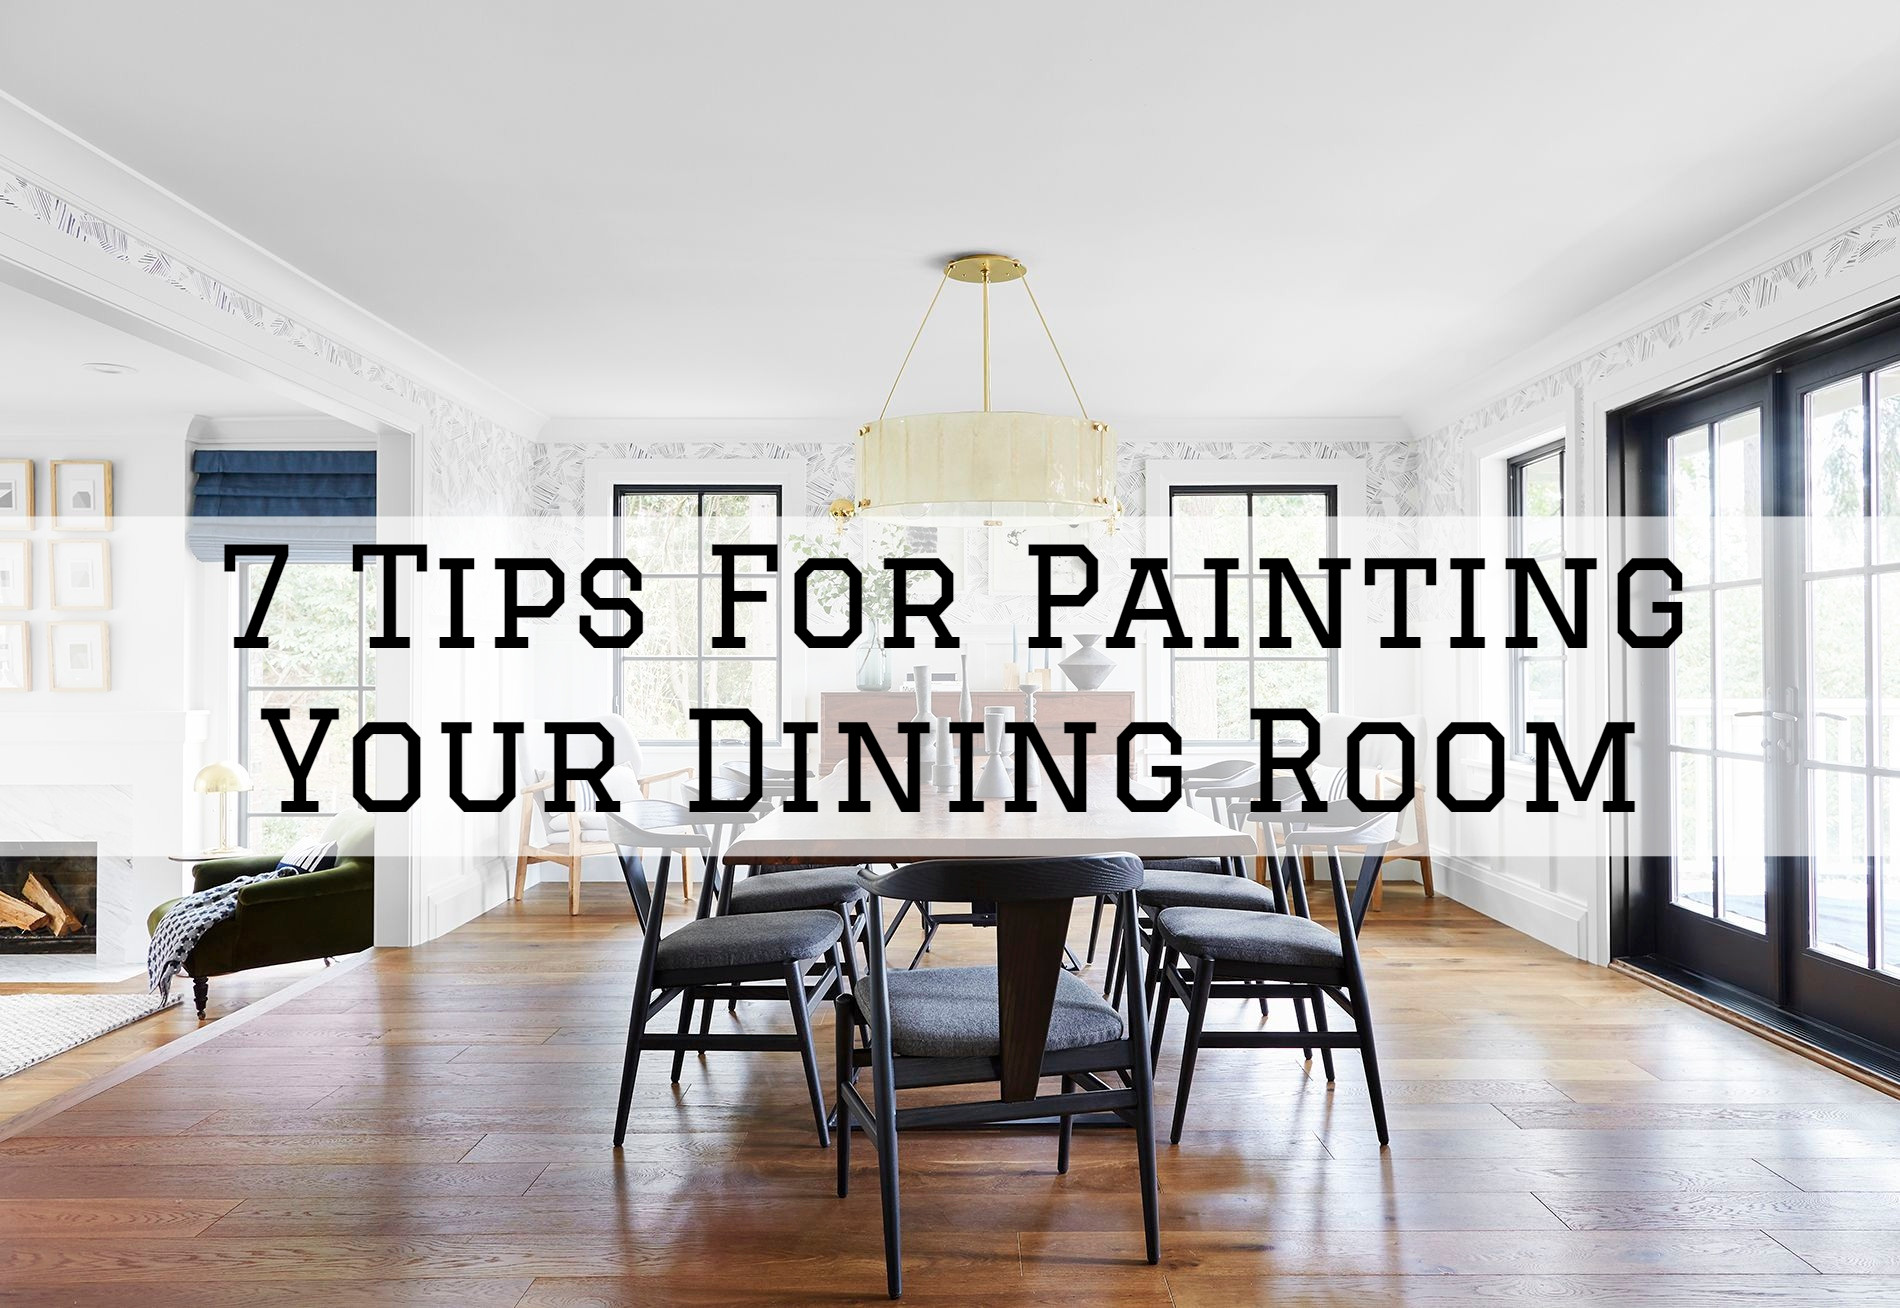
7 Tips For Painting Your Dining Room in Princeton, WI
Painting your dining room may greatly enhance the aesthetic design of your house especially when you want to emphasize its area.
Whether you’re after a minimalistic-clean style or an old-fashioned feel, painted walls in your dining area can help you bring it to reality.
There are no limits to styles and designs that you can create when you use paint, so if you want to have a change in your dining area, here are the 7 tips for painting your dining room in Princeton, WI.
1. Make Sure Everything Is All Set
When planning to paint your dining, it is very vital to make sure that everything is all set because being ready makes your work go smoothly and successfully.
You must have planned and thought of the design before you start your painting job, in this way you will be guided and be focused on your end.
Moreover, you need to make sure that you have prepared all the necessary materials and tools such as primer, paint (depending on the design you want to achieve), high-quality paintbrush, tape, roller.
Other things that you need to consider beforehand are the tools and equipment like a ladder, sanding paper, a putty knife, and spackling paste.
2. Inspect And Clean Walls
Before starting any painting job, it is very crucial that you clean the surfaces of walls, ceilings, or any faces you want to coat.
Moreover, always inspect for damages or stains on your walls to give the proper repair, this is to ensure that your walls will be even and smooth.
3. Remove Objects And Fixtures On Your Dining Area
After you finish cleaning and inspecting areas of your dining room, it is very smart to remove objects and fixtures from your place of work.
Removing objects lets you paint the walls efficiently especially if you want to paint the commonly missed spots of the walls or ceilings.
However, there are things in your home that cannot be removed such as outlets, lights or any other fixed objects, if that is the case it is very imperative to cover it with newspapers or tapes.
4. Prime Your Walls First
Priming your walls will give you a flatter and smoother end result especially if it is your first time painting.
Priming is also important for those areas that are damaged by water, with stains and other issues.
Moreover, primer lets the paint adhere properly and makes it last longer withstanding some factors such as flaking and peeling.
5. Use The Right Type of Paint
After applying primer, you are now ready to paint your walls- just make sure that you have with you the planned idea and paint so your work will not stop.
Picking the right paint is very essential because not all paint can be used on all types of surfaces, make sure that you go to professional dealers of paint to ask what kind of paint is best for your walls.
6. Cover Your Floorings
We all know that a painting project could be very messy, so you have to make sure that you cover your floorings to avoid another effort of cleaning it.
You may use old newspapers, plastics, or cartons to cover the floorings of your dining area, this will make you feel at ease that your floor tiles will be safe.
7. Make Sure That Everything Is Dry
Having a makeover can be very tiring, but this kind of project highly requires patience to get the best result.
Before you plan to bring back all the materials to your dining area, make sure that your paint is totally dry.
Sometimes too much excitement may ruin your project, so give it time to dry, anyway you will still see the end result of your efforts.
If you need professional help with your interior/exterior painting and house washing project, Steves Quality Painting and Washing is here for you.
Our home interior/exterior painting and washing services are available in Green Lake and Princeton, WI.
Call us today at (920) 527-9478 for a FREE painting estimate.
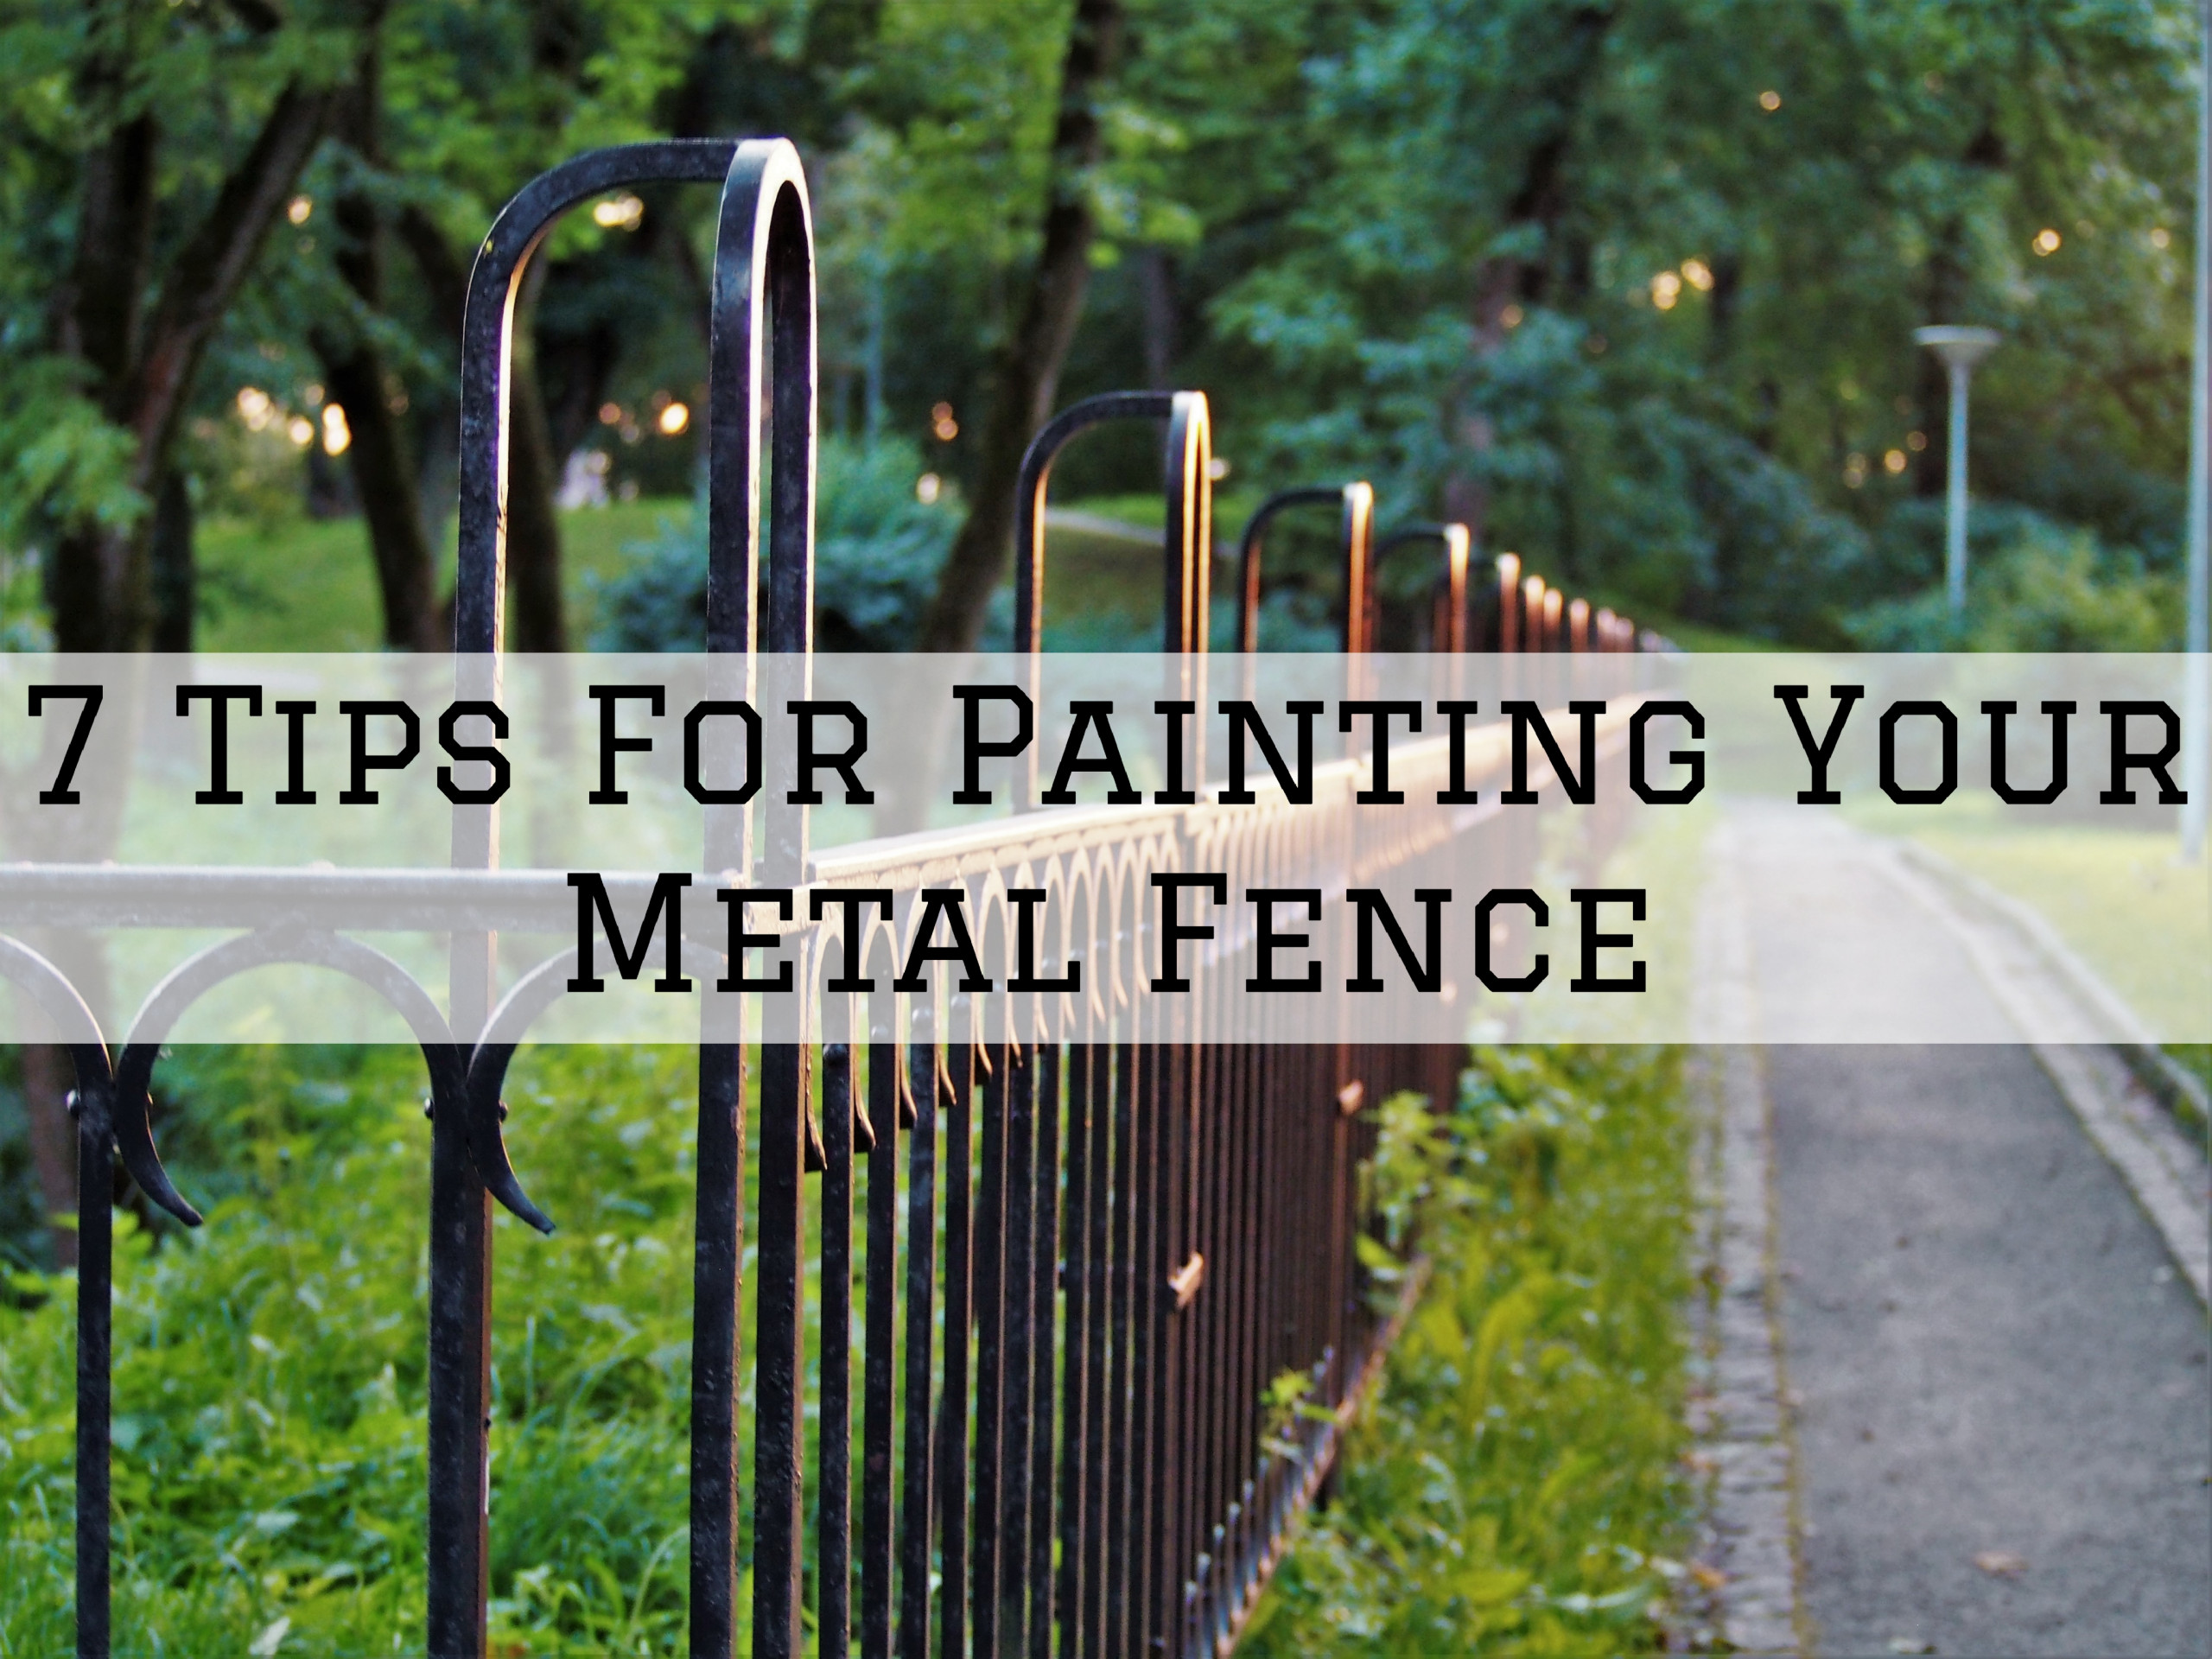
7 Tips For Painting Your Metal Fence in Princeton, WI
Painting a metal fence can be very challenging, especially if you don't know the proper way of doing it.
Before painting your wrought metal fence, you need to strip all of its paint first, remove the dust, and sand it.
So knowing some tips for painting a metal fence will be quite useful for you, especially if it's your first time doing it.
With that in mind, here are 7 tips for painting a metal fence in Princeton, WI.
1.Remove Its Rust
Removing the rust off your wrought metal fence is absolutely necessary to make sure that your primer will be absorbed by it.
Inspect if there's any rust on the surface of your metal fence, then remove it before applying the primer or the new paint.
Make sure that you're wearing safety gloves, glasses, and a facemask when removing the rust from the metal fence.
You can use steel brush, steel wool, or high grit sandpaper to effectively remove the rust from the metal fence.
2.Sand Its Surface
After removing the rust from the metal fence, you will then sand its surface as smoothly as possible.
You can consider using lighter grain sandpaper to sand its surface, especially the rough parts of the metal fence.
Sanding its surface can consume a lot of your time, but you need to do it to achieve the best results.
3.Wash Your Metal Fence
Once you're done removing all the rust and making its surface smooth, it's time to wash your metal fence with mineral spirits.
After washing your metal fence, you have to let it dry completely before applying the primer or the new paint.
Washing your metal fence with mineral spirits can remove the rust residue on your metal fence (if there's any).
You can use a rug or a scrubbing brush to clean your metal fence as you wash it, just make sure to let it dry completely.
4.Rinse It With Water
Now, you need to rinse your metal fence with just plain water to remove any mineral spirits residue.
Mineral spirits can cause your metal fence not to absorb your new paint properly.
5.Don't Forget to Apply Your Primer
Don't forget to apply your primer once your metal fence is dry.
Also, make sure that you're using a good metal primer (you can find one in your local hardware).
Then, apply the first coat of metal primer to the metal fence so that your new paint will stick properly and will last longer.
After priming, let it dry for about one to two days.
You need to make sure that it's completely dry before applying your new paint.
6.Apply Your New Paint
You need to make sure that you're using the right paint for your metal fence.
There are many types of paints, such as the paints made strictly for metal, wood, plastic, etc.
Dip your paintbrush into your new paint and begin painting across your metal fence's surface.
Apply your paint similar to the way you applied your primer.
Also, don't forget to let the first coat dry before applying the second coat.
7.Apply A Sealant
Your metal fence is exposed to different elements, that's why it's never a bad idea to apply a sealant to keep its fresh look.
Just like the primer and paint, there's also a sealant made for metals.
Don't forget to read the instructions to determine when you will apply the sealant after applying your new paint.
If you need professional help with your interior/exterior painting and house washing project, Steves Quality Painting and Washing is here for you.
Our home interior/exterior painting and washing services are available in Green Lake and Princeton, WI.
Call us today at (920) 527-9478 for a FREE painting estimate.

7 Tips For Renovating Your Kitchen On A Budget in Princeton, WI
Renovating your kitchen can cost you a lot of money, but there are ways on how to do it without breaking your bank.
If you are a do-it-yourself type of person, then knowing some tips and tricks to renovate your kitchen on a budget will be quite useful to you.
With that in mind, here are 7 tips for renovating your kitchen on a budget in Princeton, WI.
1. Don’t Change The Layout of Your Kitchen
Your kitchen’s layout is designed to last, so there’s no need for you to change the existing layout of your kitchen.
Moving your electrical wirings, plumbing of your kitchen sink, and even just your cupboards can be really expensive.
That’s why you should just stick to your existing kitchen layout and work with what you already have.
This way, not only will you save a lot of money, but you won’t also need to spend a lot of your time.
2. Repaint Your Kitchen Walls and Ceiling
One of the easiest ways of renovating your kitchen on a budget is by repainting your kitchen walls and ceiling.
Repainting your kitchen walls and ceiling (you can also include your window frame) will surely update the look of your kitchen.
Just make sure that you pick the right paint color for your walls and ceiling, especially that it’s your kitchen that we’re talking about.
If you’re having a hard time deciding what paint color to use, we recommend using vibrant, neutral, or simply white paint color for your kitchen.
3. Update Your Kitchen Cabinets
There are many ways to update your kitchen cabinets such as sanding, priming, and repainting which are all budget-friendly.
Doing all these things for your kitchen cabinet won’t break your bank, but it may consume a lot of your time depending on the number of your kitchen cabinets.
If you’re not satisfied with simply repainting your kitchen cabinets, then you can consider refacing them.
Refacing your kitchen cabinets can be more costly and harder to do compared to repainting, but it’s still a cheaper option than buying a new one.
4. Don’t Buy New Appliances If You Don’t Need Them
You don’t have to buy new appliances when renovating your kitchen, especially if you don’t really need them.
If one of your appliances is not working well, you can try fixing it first by yourself before thinking of buying a new one.
If you don’t know how to do it, you can search for a video tutorial on the internet -- there are many tutorials that you can find there.
In case there’s one part that needs to be replaced or is missing, then you can buy it in your local store or search and buy it online.
5. Clean Your Kitchen Sink
Before you think of throwing your kitchen sink away and buying a new one, try cleaning it first using a gentle abrasive cleaner.
Cleaning your kitchen sink first before throwing it away is more practical -- buying a new one can be really expensive.
So instead of buying a new kitchen sink, you can just buy a new faucet, sponge, dishwashing soap, or other important things for your kitchen.
6. Replace The Light Bulb and Switch
The light bulb used in your kitchen will not last forever, so you got to buy a new one if the one you’re currently using has been used for a long time.
You should also replace the light switch in your kitchen when renovating your kitchen as it can also make a noticeable change.
Doing these things won’t cost you much but it will make a significant change in your kitchen.
7. Consider The Tiles In Your Kitchen
There are many DIYers that do tiling by themselves -- simply by reading or watching video tutorials found on the internet.
There are also many cheap tiles that you can buy in your local store, especially if you’re on a budget.
If you don’t need to replace your tiles, then you can just buy tile paint to refresh your tile’s appearance.
If you need professional help with your interior/exterior painting and house washing project, Steves Quality Painting and Washing is here for you.
Our home interior/exterior painting and washing services are available in Green Lake and Princeton, WI.
Call us today at (920) 527-9478 for a FREE painting estimate.
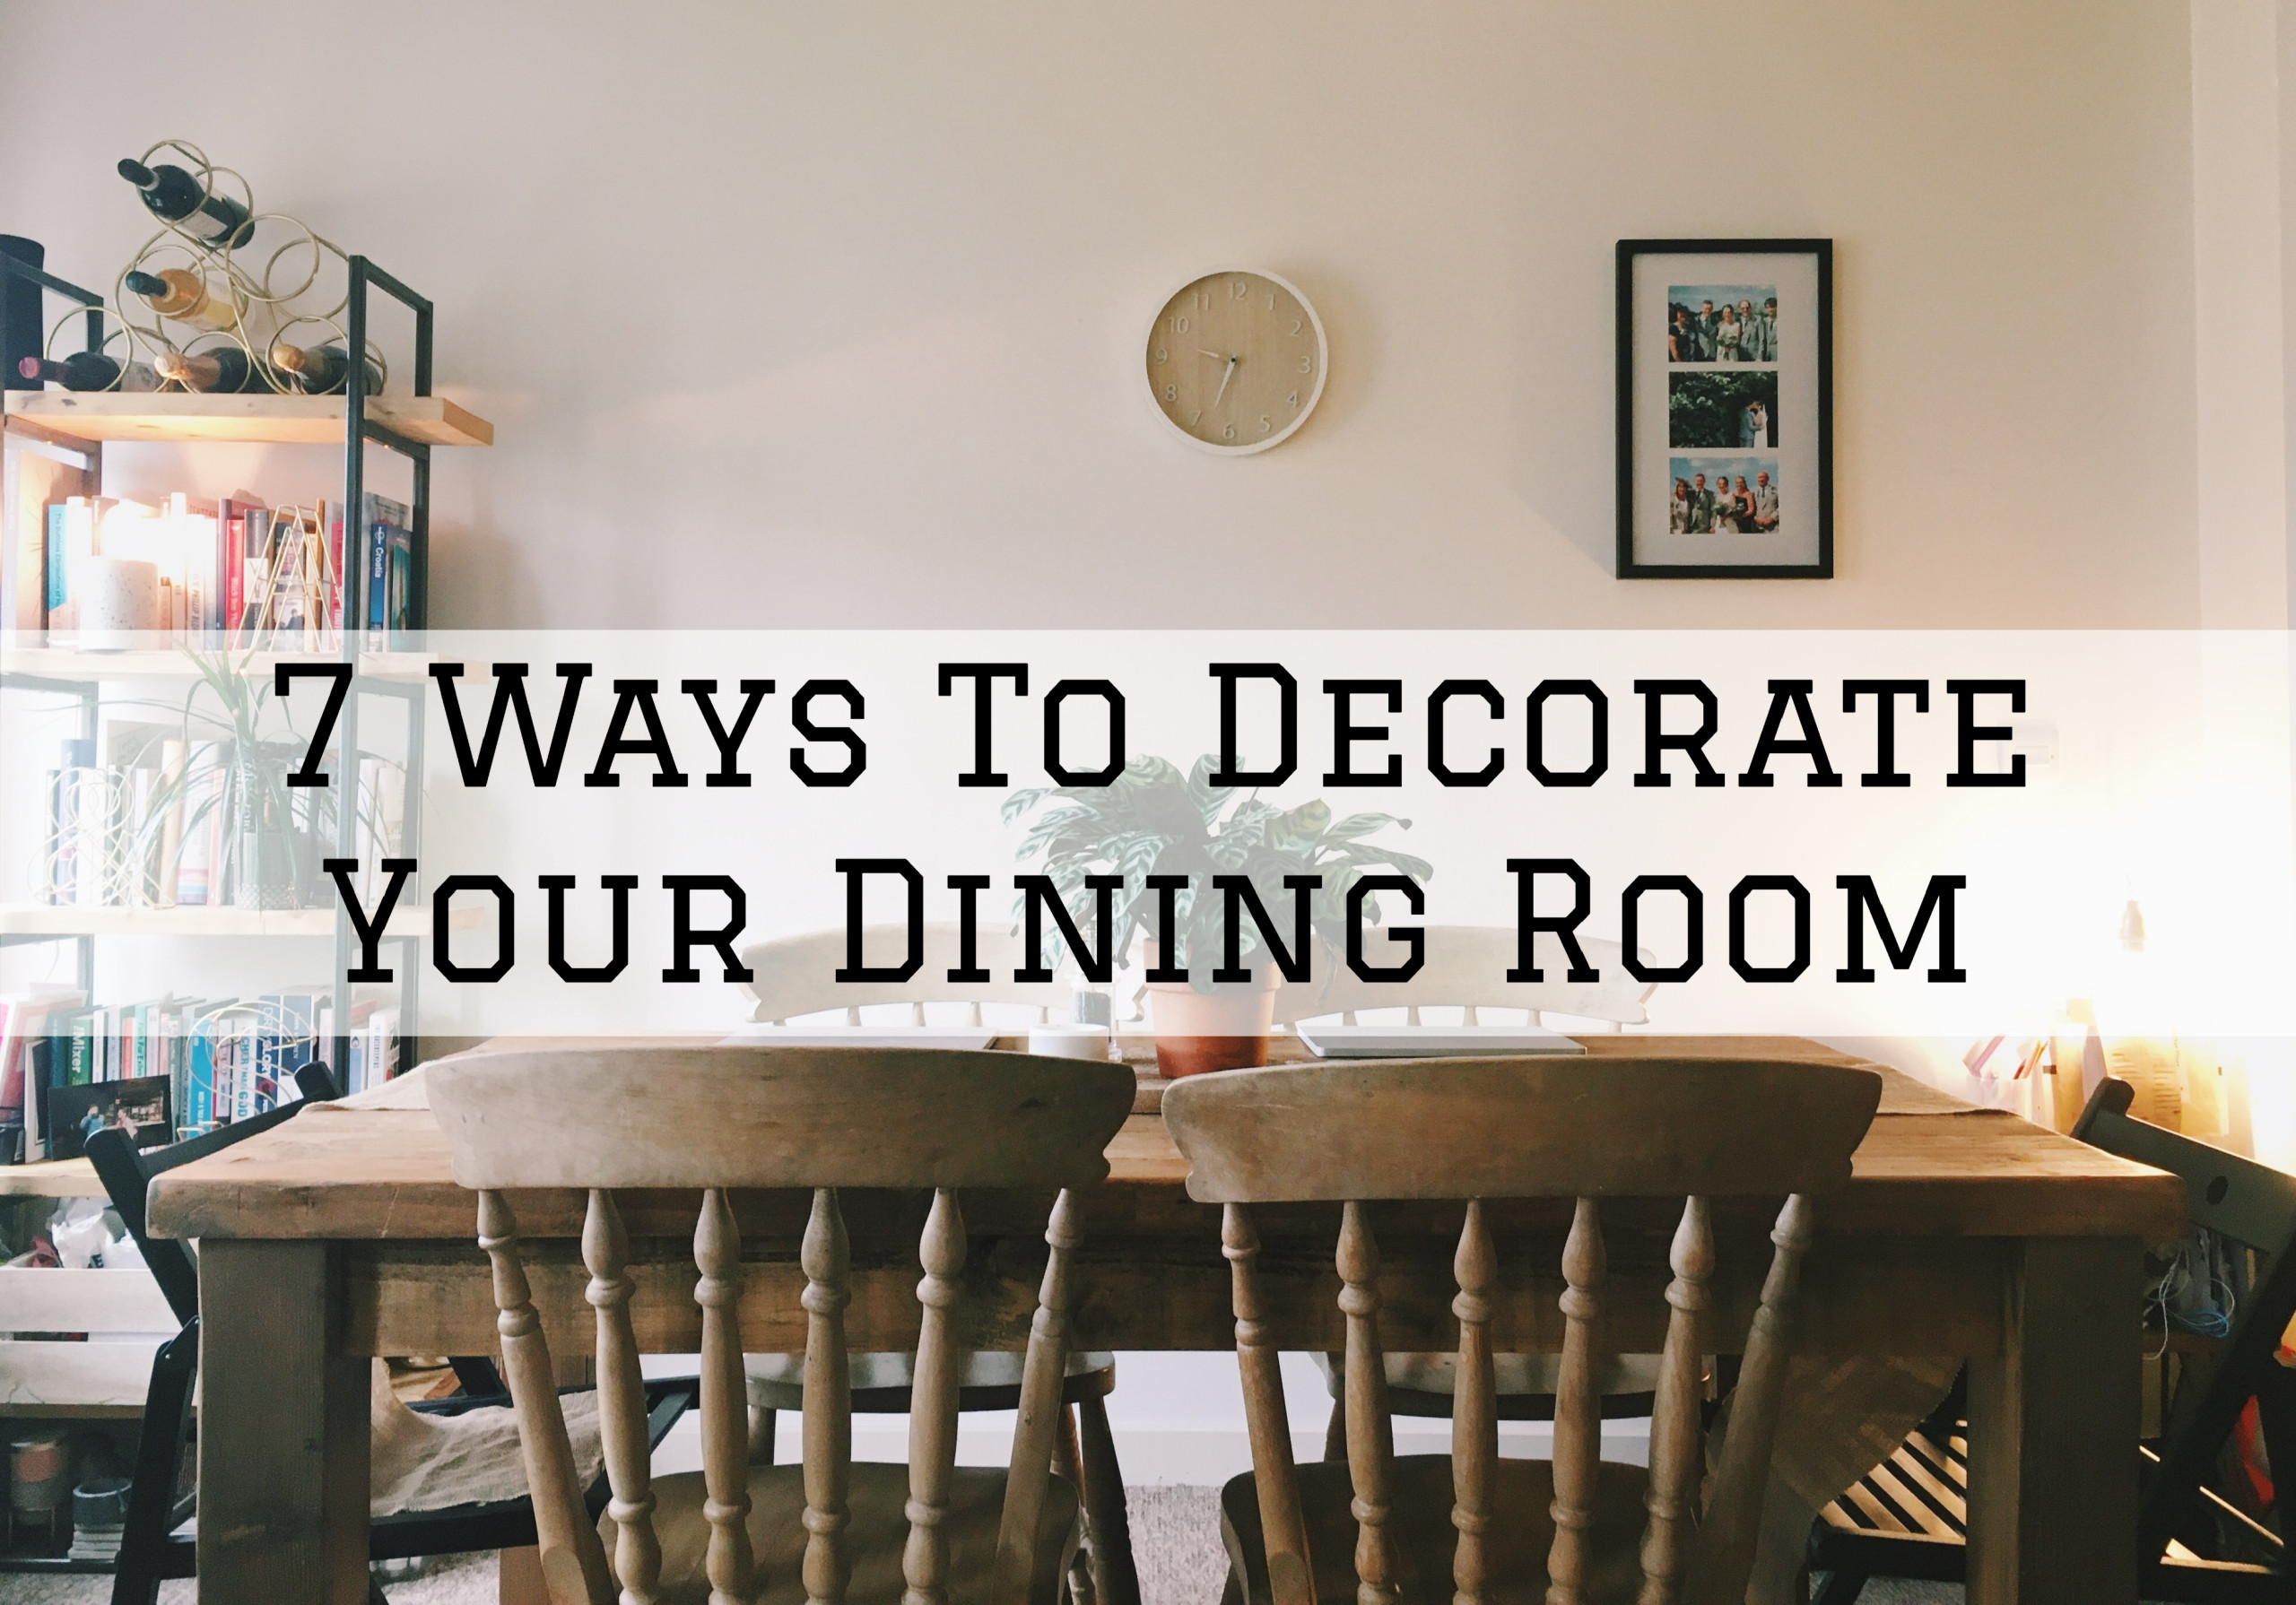
7 Ways To Decorate Your Dining Room in Green Lake, WI
There are many ways to decorate a dining room, but many people still don't know where to start.
Your dining room is a place for eating, so decorating it is always a good idea to improve your appetite when eating.
However, decorating your dining room is not that easy, so you'll be needing some tips especially if you're on a budget.
With that in mind, here are 7 ways to decorate your dining room in Green Lake, WI.
1.Repaint The Walls Of Your Dining Room
One easy way to update the look of your dining room is by repainting the walls with a new paint color.
Repainting the walls is an easy and affordable job that you can do to start your dining room decorating project.
One pro tip to make the walls of your dining room more appealing: choose light paint colors instead of just plain white paint color.
2.Put Some Artwork
One excellent way to give the walls of your dining room an artistic look is by putting in some artwork.
An artwork that is unique can surely get the attention of your guests, and start a conversation among them.
If you're on a budget, there are a lot of artwork that you can find on the internet that is very affordable.
Also, if you have a child that loves painting, you can show off their talent by putting their artwork on your dining room's walls so that your guests will see them.
3. Mix Different Furniture Styles
There are many people who want to see something unusual in their dining room rather than the traditional dining table and chairs.
If you are one of them, then show off your creativity by mixing and pairing different furniture styles.
Your dining room should be a private and personal area of your home, so it should reflect your personal taste and sense of style.
So if you're looking to redecorate your dining room but on a budget, your creativity will give you the best results.
4. Put Good Lighting
Putting good lighting can create a warm and inviting space especially for your dining room at home.
Good lighting is perfect for your dining room since it is a place for you and your family to eat your food.
One ideal option for your dining room lighting is the one that the brightness can be adjusted.
You should also consider the size of your dining room; spacious ones can go for a chandelier, while the small ones can opt for pendant lighting.
5. Put Flowers On Your Dining Room's Table
Putting some fresh flowers on your dining table will give it a more attractive look, and it is very affordable.
The flowers that you will put on don't have to be expensive since there are also flowers that are cheap but very beautiful.
The good thing about this dining room decoration idea is that you can replace it with a fresh flower from time to time.
This will give your dining room a different feel every time you replace them.
6. Put A Rug Under Your Dining Room's Table
Putting a rug under your dining room's table is a traditional way of decorating your dining room.
If you're thinking of putting a rug under your dining table, choose the ones that are made of wool or hair-on-hide (they are easier to clean and maintain).
Also, make sure that your rug won't overlap with the other area of your home.
7. Don't Forget The Final Touches
Lastly, personalize your dining room by putting in some accessories such as a flower vase and a centerpiece.
You can also put other decorative objects, but don't forget that putting too many of them can ruin the overall appearance of your dining room.
If you need professional help with your interior/exterior painting and house washing project, Steves Quality Painting and Washing is here for you.
Our home interior/exterior painting and washing services are available in Green Lake and Princeton, WI.
Call us today at (920) 527-9478 for a FREE painting estimate.
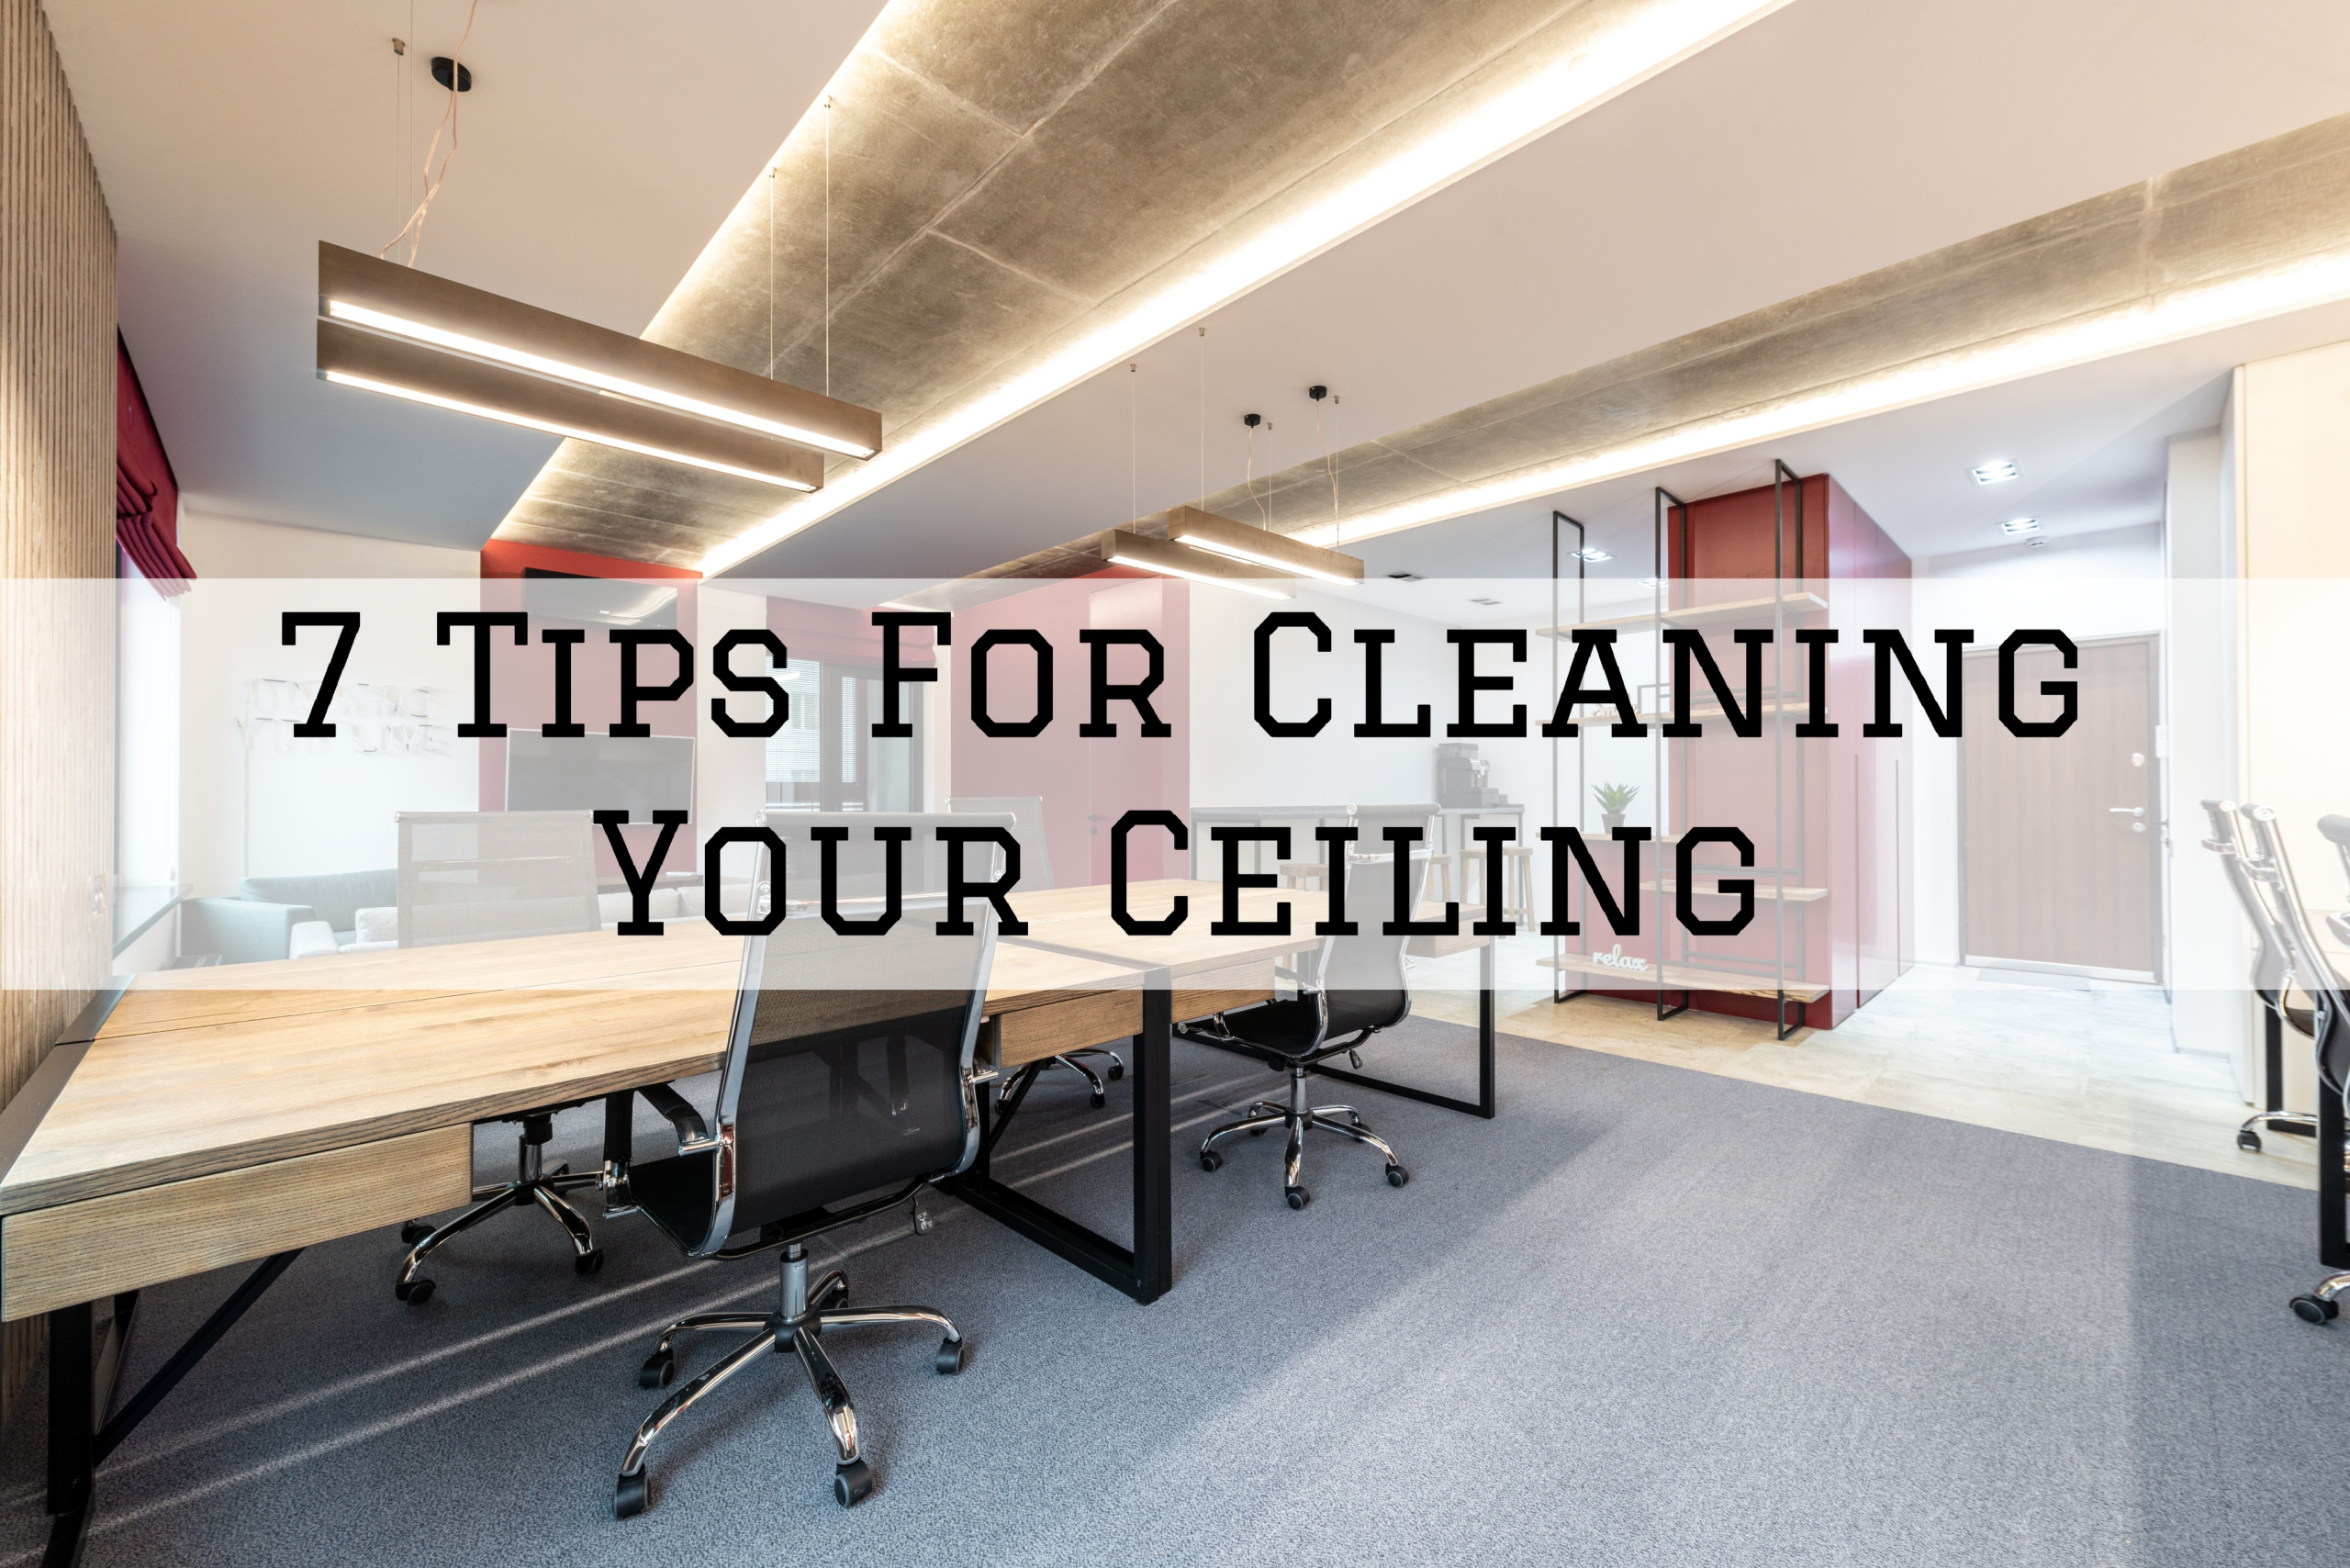
7 Tips For Cleaning Your Ceiling in Green Lake, WI
Cleaning your ceiling is never an easy and simple job since it can get a lot messier than you can imagine.
Many people clean their ceiling after a long time, and some simply ignore it and let it accumulate all the dirt and dust.
That’s why knowing some tips for cleaning your ceiling can be quite useful especially if it’s your first time doing it.
With that in mind, here are 7 tips for cleaning your ceiling in Green Lake, WI.
1. Cover The Floors
Before you begin cleaning your ceiling, don’t forget to cover the floor below it using drop cloths or some of your old clothes which you are not using anymore.
Cleaning your ceiling can be a messy job since the dirt and dust build-up will surely drop straight down to your floor.
You can avoid cleaning two things (your ceiling and your floor) by covering the floor under your ceiling.
By doing this, you’ll save yourself a lot of trouble and you’ll be spending less time with your cleaning job.
2. Clean The Floors
If the floor of your home is dirty and you’re planning to clean it, then you can clean it after you’re done cleaning your ceiling.
This way, you can consider not covering the floor under your ceiling since you’ll just eventually clean the floor once you’re done with the ceiling.
Knowing this tip can save you a lot of time and effort, so keep it in mind if you don’t want to spend time more than you’re supposed to.
3. Test Your Cleaner
Even though your cleaner claims to be of high quality, it may not be compatible with your ceiling.
If your cleaner is not compatible with your ceiling, it can lead to some discoloration so make sure to choose the right cleaner.
So to be on the safe side, test your cleaner in a small area of your ceiling that’s not quite noticeable and see if there are any bad effects.
If there’s no adverse effect, then you can use your cleaner with the rest of the ceiling without any worry about anything.
4. Clean The Vents And The Area Near It
The area near the vents of your ceiling is usually overlooked by many people when cleaning their ceilings.
This isn’t a good thing since the air that circulates inside your home which you breathe comes from the vents.
If the area near the vents or the vent itself has a lot of dirt build-up, then the air that you breathe will also be dirty.
For this reason, you should clean the vents and the area near it so that the air that circulates inside your home is clean.
5. Use Vacuum Cleaner
When cleaning the ceiling of your home, you’ll have to use a lot of wet cleaners to effectively clean your ceiling.
However, the best way to get rid of all the dust that has been accumulated on your ceiling is with the use of a vacuum cleaner.
Just make sure that you’re using your vacuum cleaner with the right nozzle and extension attachment.
6. Use A Feather or Microfiber Duster
There are certain situations that it’s more appropriate to use a feather or microfiber duster when cleaning your ceiling.
When you’re dealing with the areas of the ceiling that are delicate, you don’t want to exert too much force to avoid any damages.
So what you can do is to clean these delicate areas using a feather or microfiber duster.
7. Be Careful When Cleaning Popcorn Ceilings
When you have to clean textured ceilings like popcorn ceilings, you have to be very careful to avoid causing any damage to them.
Sometimes, your best option to deal with a dirty popcorn ceiling is to apply new paint to it.
If you need professional help with your interior/exterior painting and house washing project, Steves Quality Painting and Washing is here for you.
Our home interior/exterior painting and washing services are available in Green Lake and Princeton, WI.
Call us today at (920) 527-9478 for a FREE painting estimate.

7 Ways To Update The Look Of Your Home Exterior On A Budget in Green Lake, WI
Although many home exterior updates can be really costly, there are still some ways to update the look of your home’s exterior on a budget.
The exterior of your home is just as important as the interior, so giving it an update from time to time is always a good idea.
With that in mind, here are 7 ways to update the look of your home’s exterior on a budget in Green Lake, WI.
1. Repaint Your Front Door
If you want to make a good first impression on your guests, applying a fresh coat of paint to your front door will surely do the job.
Consider repainting your front door and choose bold colors to make the exterior of your home look more inviting and interesting.
Not only will it improve the look of your home’s exterior, but it will also boost the curb appeal of your home.
2. Put A Bench
If your space outside your front door allows it, bring in a small and fancy bench just beside your front door.
This bench will serve as a resting area for any unexpected visitors waiting for you.
It can also be a spot where you can put your groceries or packages while you’re finding your keys to the front door.
Additionally, benches come in various types of designs, so you’ll have many options to choose from that will pair well with your home’s decoration.
3. Put Good Lightings
Good lightings will surely improve the look of your home, especially with stylish new fixtures.
If your budget only allows you to buy one or two new fixtures, choose a specific area where it can get more attention aside from your front door.
Good lightings will make your home’s appearance more appealing and improve its ambiance, especially when it’s night.
4. Power Washing
Power washing is one of the easiest and affordable ways of updating the appearance of your home’s exterior.
If you already have a power washer at home, you’ll be spending less because you only need to spend on some cleaning solutions.
However, if you don’t have one, you will have to rent a power washer which costs around $40 to $100 a day.
Fortunately, most DIYers can clean their home’s exterior within one afternoon, if you have more time to spare, you can power wash the nearby pavement as well.
5. Update Even The Small Details
If you think you’ve tackled most of the large details for your home’s exterior, don’t forget to update even the small details, too.
Updating even the small details has a huge impact when it comes to improving the appearance of your home’s exterior.
Also, it is budget-friendly, that’s why if you’re looking for some updates for your home’s exterior on a budget, consider this tip.
6. Put Some Beautiful Plants and Flowers
Putting some plants and flowers outside your home will not only make your home’s appearance more appealing but also add life to it.
You can also put your plants and flowers in fancy containers with bright colors, which will definitely add colors to your space.
If you don’t have money for a flowerbed, these cheap but decorative containers are a good alternative where you can put your flowers and plants.
Also, there are many cheap but beautiful flowers and plants that you can find on the market, so you don’t have to worry about it.
7. Reseal Your Driveway
Applying a fresh coat of blacktop sealer to your driveway is an excellent update that you can do, especially if it has seen better days.
Resealing your driveway will make it look as if it’s brand new and will surely make a noticeable change.
One pro tip: remove the weeds and debris from small cracks and fill it with masonry crack filler.
If you need professional help with your interior/exterior painting and house washing project, Steves Quality Painting and Washing is here for you.
Our home interior/exterior painting and washing services are available in Green Lake and Princeton, WI.
Call us today at (920) 527-9478 for a FREE painting estimate.
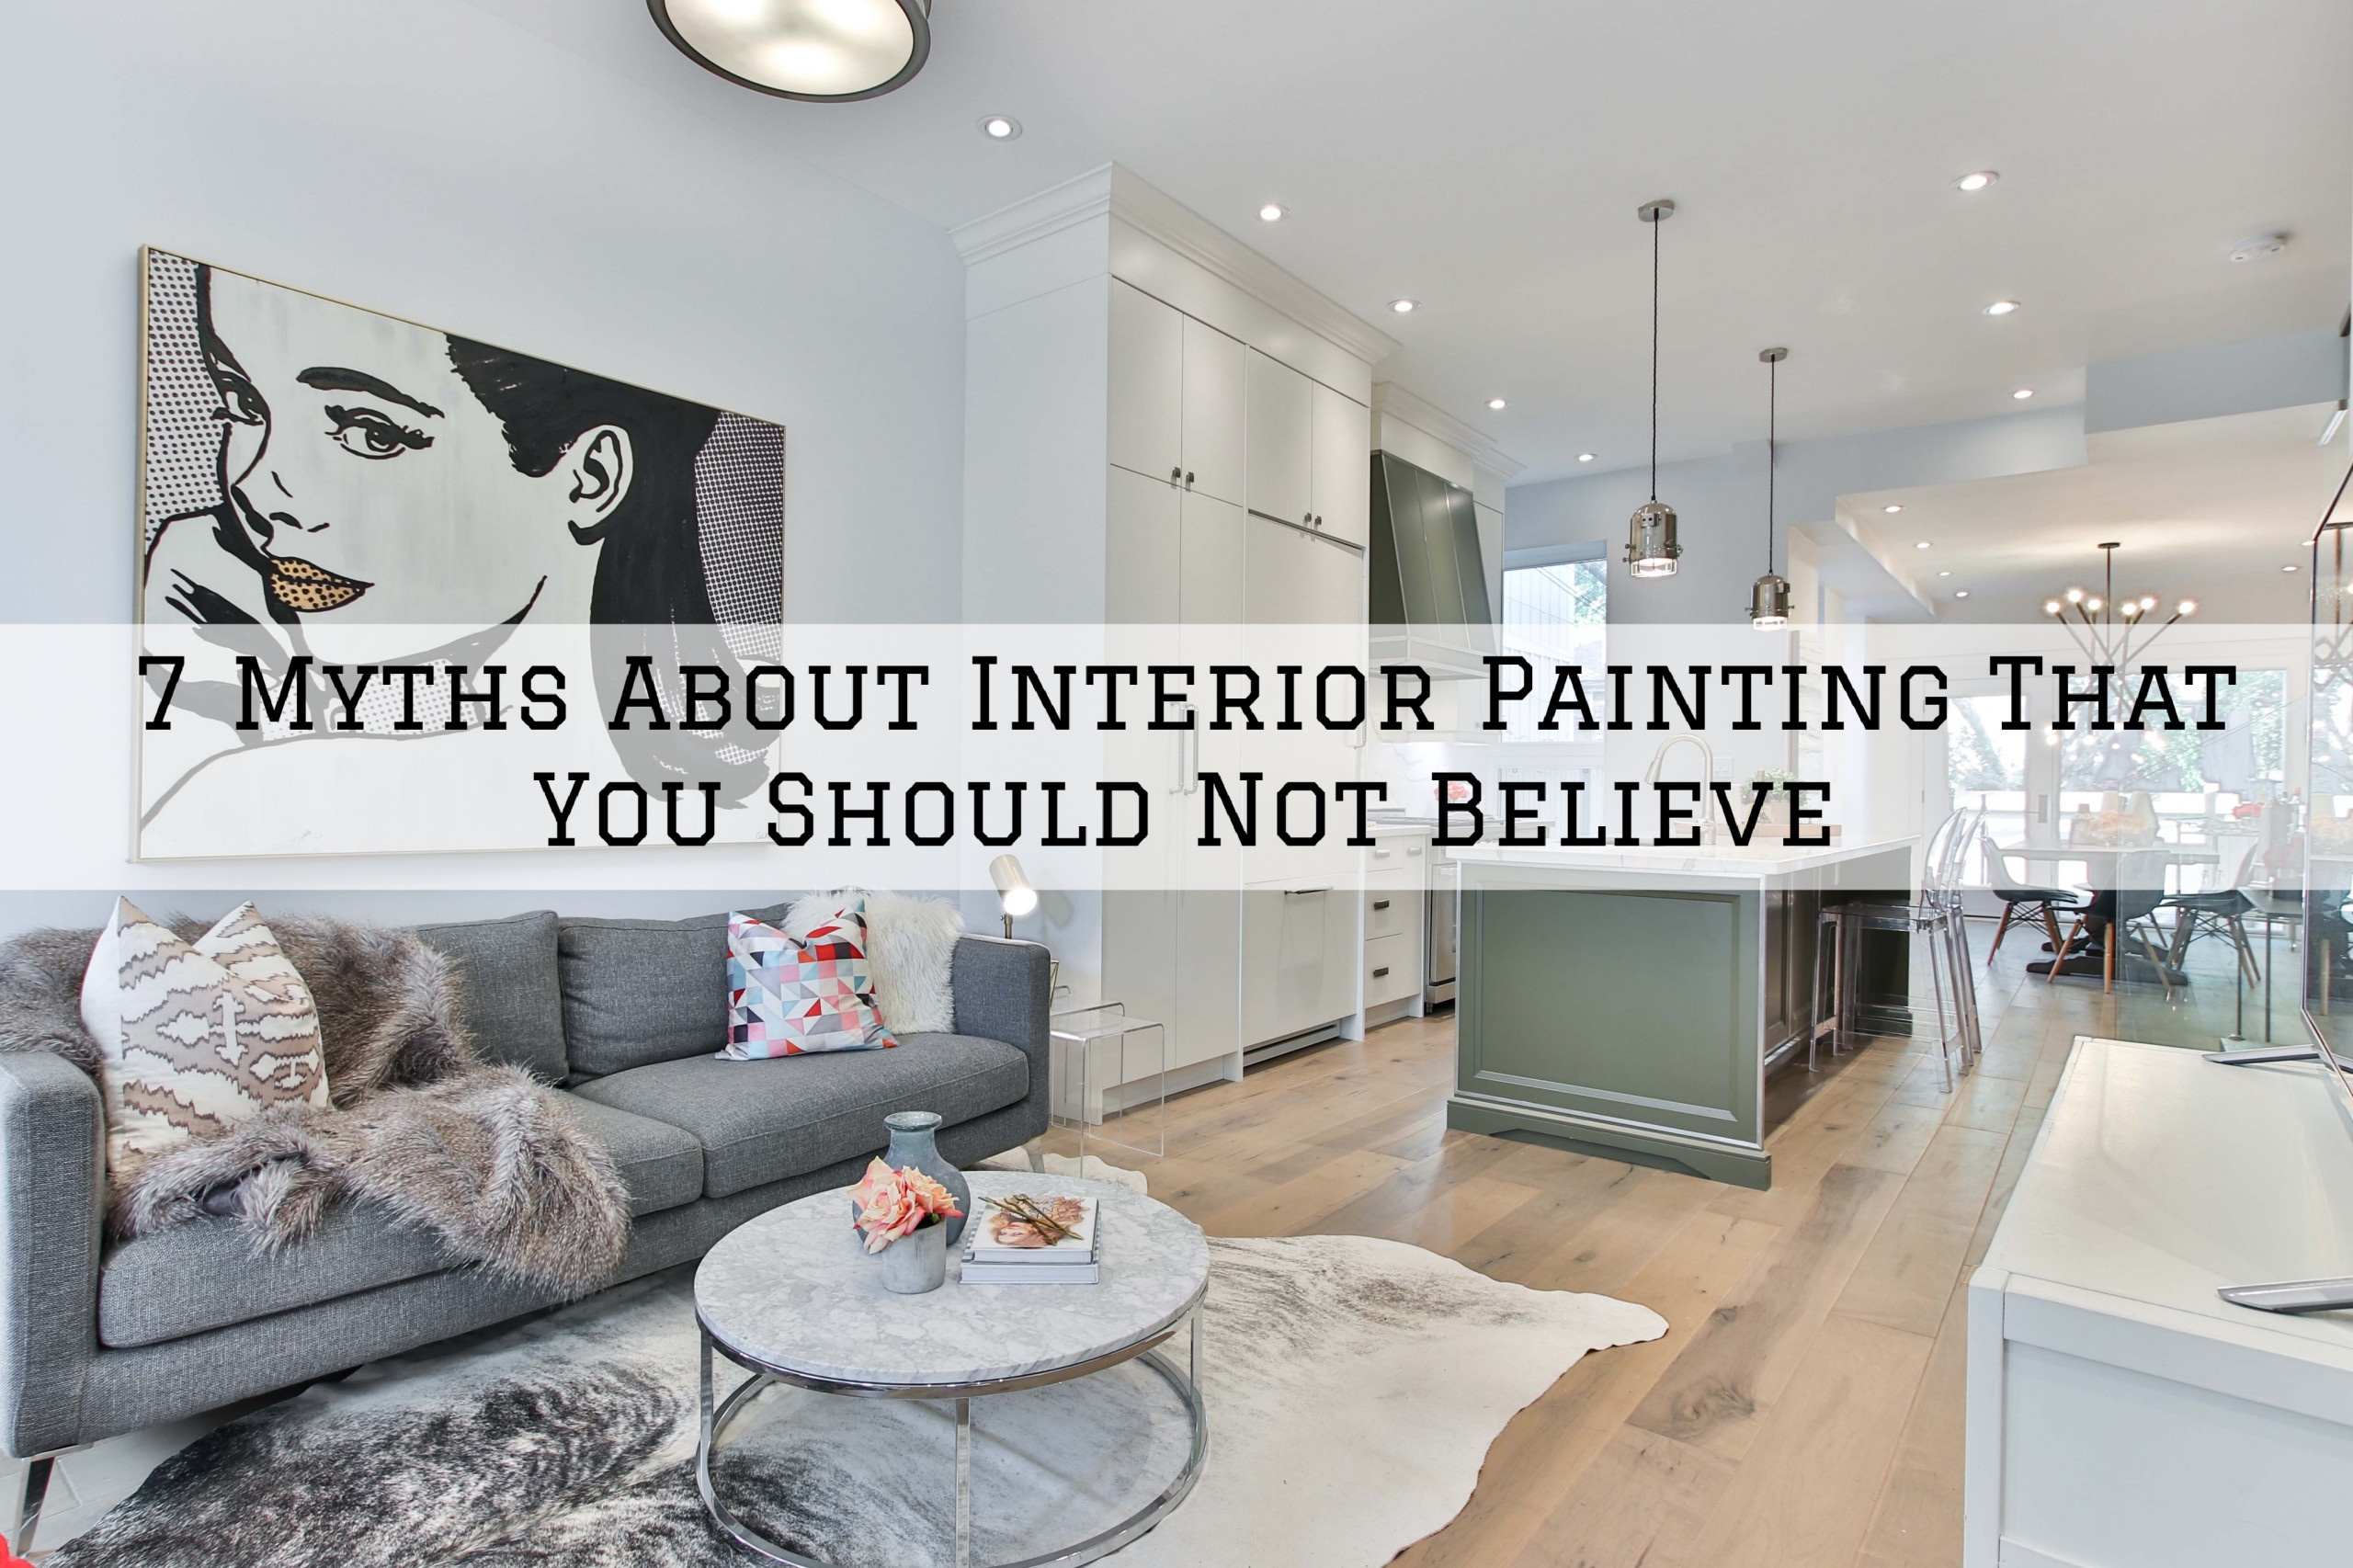
7 Myths About Interior Painting That You Should Not Believe in Princeton, WI
It’s always a good idea to apply a fresh coat of paint to update the look of the interior of your home.
Most people know the transformative effect of repainting your home’s interior, however, there are many misconceptions about the way of doing it right.
We’ll be sharing with you some myths about interior painting to clear things up for everyone who’s looking to paint their home’s interior.
Here are 7 myths about interior painting that you should not believe in Princeton, WI.
1. The Paint Brand or Paint Type Doesn’t Matter
This is one of the most common misconceptions about any painting project that you should not believe especially when painting your home’s interior.
Not all paint brands will produce results that are long-lasting, also, you need to use a specific type of paint for a specific type of surface.
So if you ever heard from someone that paint brand or paint type doesn’t matter, don’t believe them.
2. The Color From The Color Paint Swatch Will Look The Same When Painted
Although having a color paint swatch is an excellent way of finding the right paint color for you, it will not look exactly the same when applied.
A color paint swatch is simply a guide for you and your applied paint color will look a little different which also depends on the surface you’re painting.
The same goes for the color paint swatch found on your computer or your mobile phone.
The reason for this is that each one of them (your computer or mobile phone) has a different resolution.
3. No Cleaning or Sanding Is Needed If You’re Applying A Primer
We don’t know where this idea came from, but it’s still important for you to do some prep works even if you’re using a primer.
Prep works such as cleaning, sanding, and scraping peeling or flaking paint will give you more satisfying results from your interior painting project.
It is very important to do some prep works before your start painting your home interior walls to make it easier for your new paint to adhere to the surface.
4. High-Gloss Paint Has The Most Durable Finish
If you’re looking to paint your kitchen or your child’s bedroom, many people would consider using high-gloss paint.
The reason for this is that high-gloss paint is easier to clean, resistant to peels, and “has the most durable finish”.
Many people think that high gloss paint will give a more durable finish than a satin or matte finish.
However, it’s not true; the durability doesn’t depend on what paint finish you consider using.
The paint finish is the appearance of your paint, and the higher the sheen, the shinier it looks.
5. It Is Optional To Apply A Primer
Most people think that if the surface of the walls that they will paint is smooth already, with no peeling or cracked paint, it’ll be fine even without a primer.
However, you should not believe this myth about interior painting since it can possibly cause you a lot of problems in the future.
If you want quality and long-lasting results, then you should apply a primer to the surface before you start painting it.
By applying a primer to the surface that you will paint, you’ll make it easier for your new paint to stick to it and it will look smoother and shinier.
6. It Doesn’t Matter What Paintbrush You Use
This is one of the most common myths about interior painting that you should not believe.
It is very important to use the right type of paintbrush for your interior painting project to achieve an excellent paint finish.
Paintbrushes come in different sizes and styles, so make sure to choose the right one for your paint job.
7. DIY is Cheaper
Hiring a professional doesn’t necessarily mean that it’s more costly than doing it yourself.
For example, if you’re doing a painting job for the first time, you’ll have to buy all the tools and supplies that you’ll need.
Also, consider the cost of the time that you’ll have to spend working on your interior painting project.
If you need professional help with your interior/exterior painting and house washing project, Steves Quality Painting and Washing is here for you.
Our home interior/exterior painting and washing services are available in Green Lake and Princeton, WI.
Call us today at (920) 527-9478 for a FREE painting estimate.
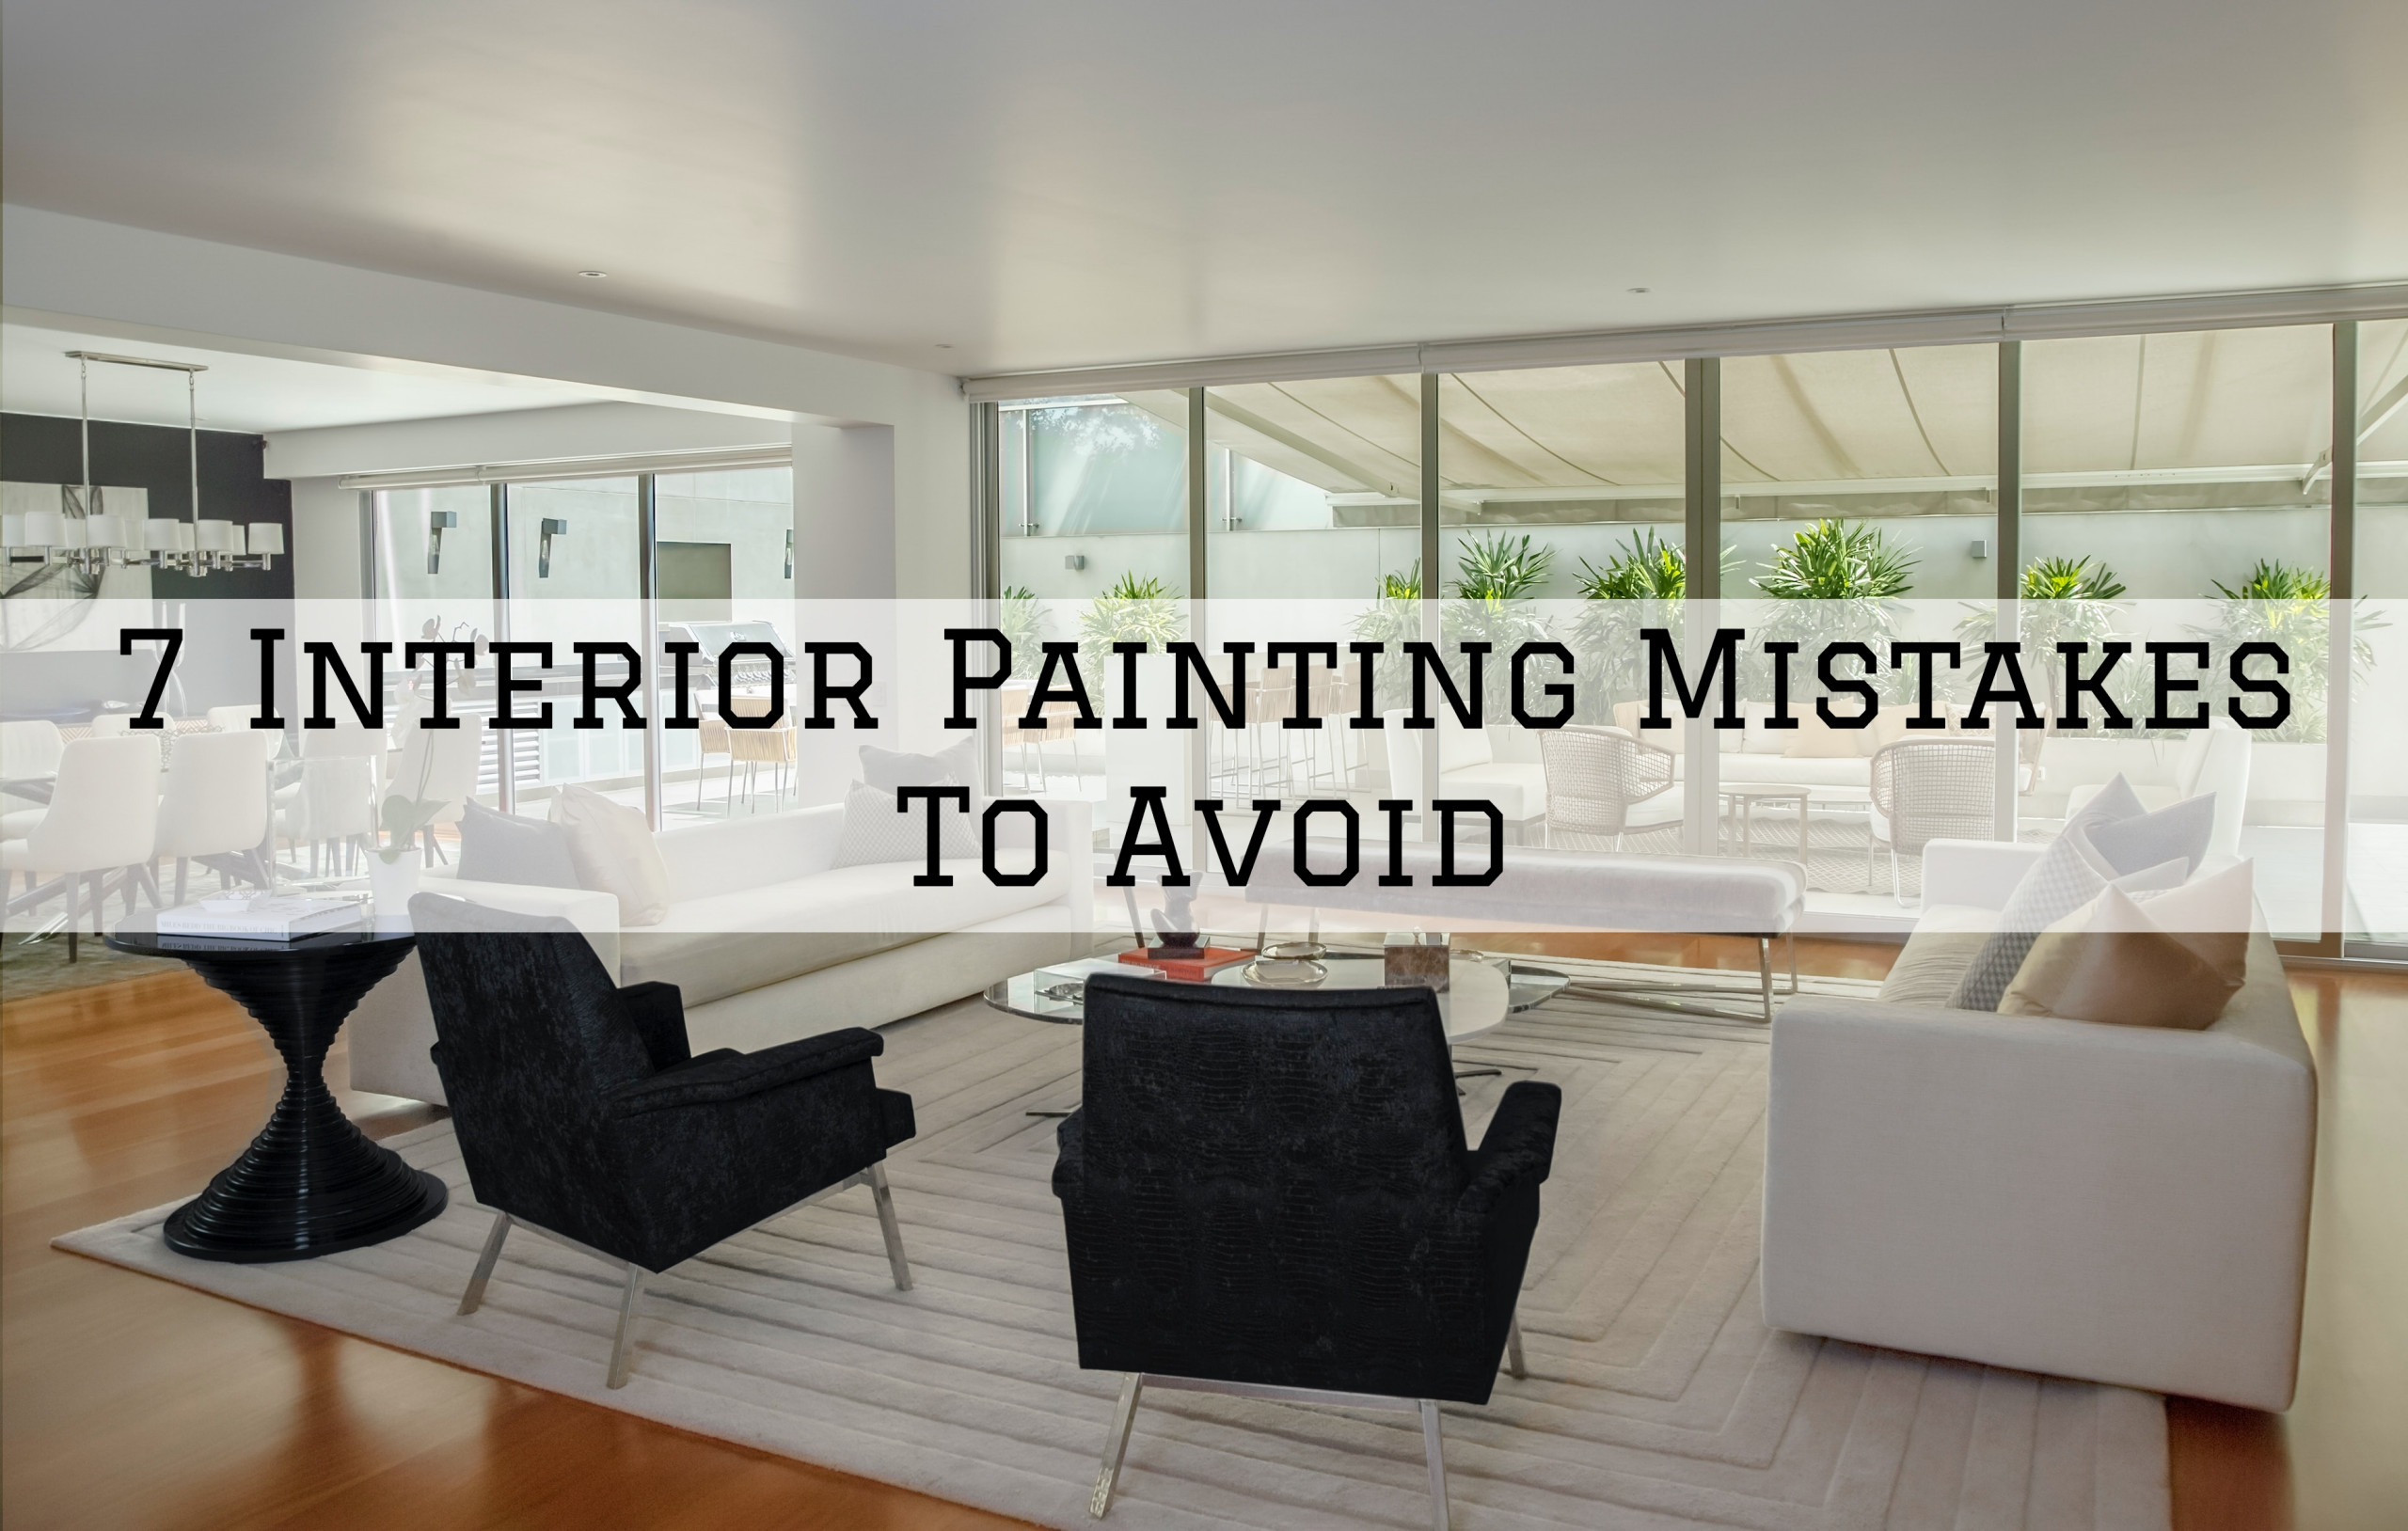
7 Interior Painting Mistakes To Avoid in Princeton, WI
Painting the walls of your home’s interior is one of the easiest and most effective ways of giving it an update.
It is also a fun and exciting activity for most DIYers, however, making some mistakes is inevitable especially when it’s your first time doing it.
With that in mind, here are 7 interior painting mistakes to avoid in Princeton, WI.
1. Applying Your New Paint on an Unprepared Surface
You need to prepare the surface of your home’s interior walls and ceilings before applying your new paint to them.
Painting on an unprepared surface will lead to an uneven paint finish which is not satisfying.
To avoid making this mistake, do some necessary prep works to achieve desirable results from your interior paint job.
To get started, clean the surface of your walls and ceilings, remove flaking and peeling paint, and scrape glossy surfaces.
2. Your Fixtures Are Unprotected
Painting the interior of your home will certainly be a messy job, and you don’t want your fixtures to get caught up in it.
For this reason, make sure to protect your fixtures by covering them with plastic and tape before you start painting.
Your doorknobs, light switches, and light fixtures are some of the things that you need to protect and cover.
By doing this, applying your new paint will not affect them and will only adhere to your walls or ceilings.
3. Using The Wrong Tools
When painting your home’s interior, you can’t simply use any tools.
There are tools that are appropriate for your paint job in order to get the best results.
For example, there are situations wherein using a roller is better, and there are also times when using a paintbrush is more effective.
If you know what tool is best to use, any paint job will be an easy job for you.
4. Not Using Painter’s Tape
If it’s your first time doing a paint job by yourself, you might not have heard of what a painter’s tape is.
If you want to have a uniform paint finish in areas such as your windowsill, it is very important to use painter’s tape.
Also, don’t forget that you have to remove the painter’s tape before your applied paint dries out.
If the paint dries and you failed to remove the tape, the paint will adhere to your painter’s tape.
To avoid this from happening, remove the painter’s tape shortly after applying your new paint.
5. Not Prioritizing Your Ceiling
Many people make a mistake by starting their interior painting job with the walls first and the ceilings last.
If you painted your walls first, painting your ceiling will be extremely difficult since you will have to paint very carefully to avoid smudges.
This will consume a lot of your time so for you to avoid this mistake, always prioritize painting your ceilings first.
If you’re not concerned about paint smudges, your paint job will be so much easier and faster.
6. Painting on Rotten Wood
You’ll just be wasting your time and materials if you’re planning to paint on rotten wood.
So to avoid making this mistake, replace any rotten or rotting wood before you begin painting.
Also, you have to smooth rough surfaces and fill the uneven areas before applying your new paint.
7. Painting on Wet Surface
Some areas inside your home are more exposed to water such as your kitchen and bathroom.
Before painting these areas, make sure to let the walls and ceilings dry completely to avoid blistering or peeling paint.
Humid areas such as your bathroom need more time to dry, so give it enough time for its wall and ceiling to dry totally.
If you need professional help with your interior/exterior painting and house washing project, Steves Quality Painting and Washing is here for you.
Our home interior/exterior painting and washing services are available in Green Lake and Princeton, WI.
Call us today at (920) 527-9478 for a FREE painting estimate.

7 Interior Paint Colors To Consider in Princeton, WI
There are countless choices for your interior paint colors, that’s why many people are having a hard time deciding what’s the right color for their home.
Choosing the best paint color for your interior is not an easy task, there are many different colors that give off different feel or vibe.
If you’re planning to paint your interior and having trouble thinking about what’s the best paint color to use, we’re here to give you some ideas.
Here are 7 interior paint colors to consider in Princeton, WI.
1. White
White is a classic choice for your interior paint color, especially for certain areas inside your home such as your living room, kitchen, and bathroom.
The reason for this is that it’s easy to maintain since you can see any dirt on a surface painted with white, so you can simply wipe it off to clean.
Also, the white color reflects all light and makes the inside of your home look bigger in size.
This is why most of the ceilings of every house are painted with white color.
It’s also one of the best colors to pair with darker colors to achieve an amazing high contrast appearance.
2. Black
Black is a color that is extremely interesting and will add a bit of drama to the interior of your home.
It is an intimidating color, however, it attracts more attention when used as your interior paint color.
Walls that are painted with black can also help in decreasing the radiance of the sun, especially if your home is exposed to daylight.
There are many interior designs that incorporate the black color since it makes a statement that will be the center of attraction inside your home.
3. Gray
If you’re looking for something that looks old-fashion, consider adding grey colors to your home’s interior.
Gray is a popular choice if you’re looking for a neutral paint color for the interior of your home, especially your living room.
It can also provide a nice background for artworks, this is why many people (especially those who love arts) choose gray for their interior paint color.
4. Green
Now, if you want something that reminds you of nature inside your home, consider the green paint color.
This color reminds you of trees, plants, grass, and all other beautiful things that are found in our nature.
If the space of your home’s interior doesn’t allow you to have indoor plants, or you don’t have the money to buy it, consider using a green paint color.
It is a good alternative if you’re looking for a soothing ambiance or something that will revitalize your home.
5. Blue
Blue is America’s favorite color, so choosing the blue color will never be a bad idea.
This color has various attractive shades, and they can all pair well with neutral colors such as brown and cream.
If your home’s interior has hardwood floors, choosing blue as your interior paint color will definitely make your home a lot more stylish.
Not only that, but it can also give your home a soothing and relaxing feel that can surely calm your mind.
6. Beige
Beige is a timeless choice especially when we’re talking about home interior paint color ideas.
It gives your home a simple yet elegant look, perfect for people who are looking for a minimalist interior design.
By simply adding accessories and bright colors, you can also make a beige-themed interior look luxurious.
Beige is a flexible color, this is why many interior designers opt for beige for their interior designs.
7. Yellow
Yellow is the color that’s closest to the color of the sun, and just like the sun, its vibrancy adds warmth to your home’s interior.
Choosing yellow for your interior paint color will give you that cozy feeling that everyone’s looking for.
If you need professional help with your interior/exterior painting and house washing project, Steves Quality Painting and Washing is here for you.
Our home interior/exterior painting and washing services are available in Green Lake and Princeton, WI.
Call us today at (920) 527-9478 for a FREE painting estimate.
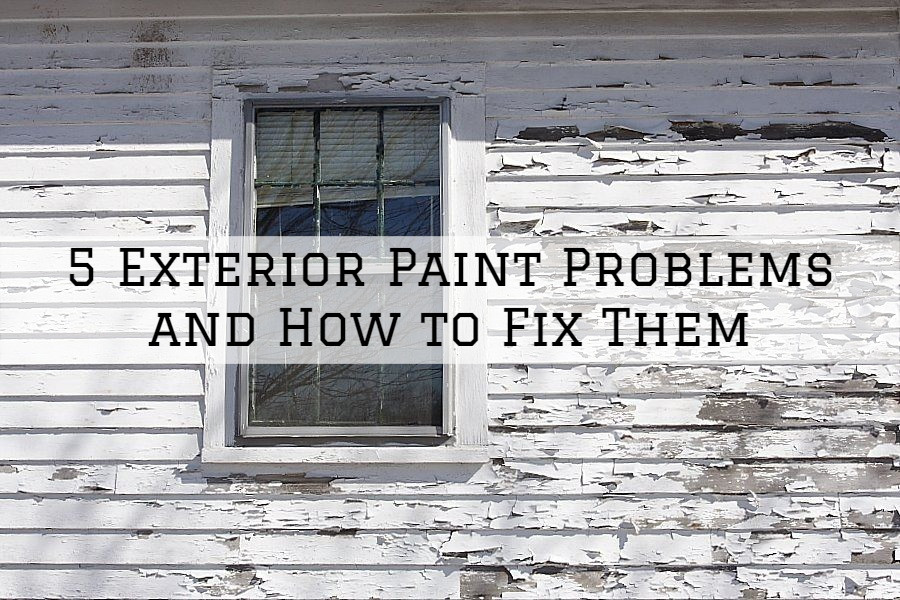
5 Exterior Paint Problems and How to Fix Them in Green Lake, WI.
Some exterior paint problems are mostly caused by inevitable weather conditions such as sun exposure, rainfall soaks, and change in temperature.
There is nothing you can do about that, but you can fix and avoid some of these problems by knowing the reason and the solution.
With that in mind, here are 5 exterior paint problems and how to fix them in Green Lake, WI.
1. Mildew
Mildew is a specific form of mold or fungus known for its green, brown, gray, or black spots that feed and grow on the paint film.
Your home’s exterior is likely to have mildew due to these reasons.
- Poor ventilation
- Moisture
- Lack of heat coming from the sun
- Applied paint on a surface with mildew
- A low-quality of paint was used
- No primer was applied before painting bare wood
Here are some solutions for mildew.
- Wear eye protection and gloves then scrub it with a trisodium
- Rinse it with clean water, wash the area with a detergent, then rinse again
- Use a high-quality paint
- Prime the bare wood before you start painting it
2. Peeling Paint
One common paint problem is paint peeling where paint film peels off from the surface.
It is most likely due to poor adhesion but there are also some other causes to it.
Your home’s exterior is likely to have peeling paint due to these reasons.
- Applying paint to a dirty, wet, or shiny surface
- Insufficient drying time between coats
- A low-quality of paint was used
- Ignoring a blistering paint
Here are some solutions for peeling paint.
- Scrape the peeling paint
- Sand the affected area until smooth
- Prime the area before you start painting
- Use appropriate caulking product
- Use a high-quality paint
3. Blistering Paint
Blistering paint, also known as bubbling paint, is the blisters or bubbles under the paint film that are usually seen on wood trims and sidings.
Your home’s exterior is likely to have blistering paint due to these reasons.
- Applying paint under extreme heat coming from the sun (this traps the solvent vapor since the paint dried quickly)
- Applying paint to a wet surface (this causes the paint film to expand due to the trapped moisture)
- Improper house ventilation (this causes moisture to escape through your walls)
Here are some solutions for blistering paint.
- Apply paint when it’s not too hot
- Scrape blistered paint
- Sand to bare wood
- Let the wood dry completely
- Prime the wood before you start painting
- Try putting siding ventilation
4. Rust Stains
Rust stains are the reddish-brown to black stains on the painted surface of your home’s exterior.
Your home’s exterior is likely to have rust stains due to these reasons.
- Used non-corrosion-resistant nails to attach siding
- Steel nails have popped up (this causes it to have contact with air which develops rust)
- Too much sanding removed the galvanized coating on your nail heads
- Black stains are most likely caused by the reaction between tannic acid from your moist wood and your steel nails.
Here are some solutions for rust stains.
- Attach the siding using stainless steel nails
- Hammer the steel nails properly and make sure they won’t pop up
- In case you cannot extract a rusted nail, remove its rust by sanding its nail head and applying a stain-blocking primer
- Use a high-quality paint
5. Alligatoring and Checking
Alligatoring is the cracked pattern that looks like the skin of a reptile.
Checking is similar to alligatoring, however, it’s less severe and characterized by long, spaced cracks in the paint film.
Your home’s exterior is likely to have alligatoring and checking due to these reasons.
- Applying a second coat of primer to a first coat that is not yet completely dry
- Applying a second coat over an incompatible (example: glossy paint)
- Oil-based paint lost its elasticity after a long time (this leads to cracks due to change in temperature)
Here are some solutions for alligatoring and checking.
- Scrape the old paint, then sand until smooth
- Apply a primer before you start painting
- Apply a second coat of primer after letting the first coat dry completely
- Use high-quality paint
If you need professional help with your interior/exterior painting and house washing project, Steves Quality Painting and Washing is here for you.
Our home interior/exterior painting and washing services are available in Green Lake and Princeton, WI.
Call us today at (920) 527-9478 for a FREE painting estimate.
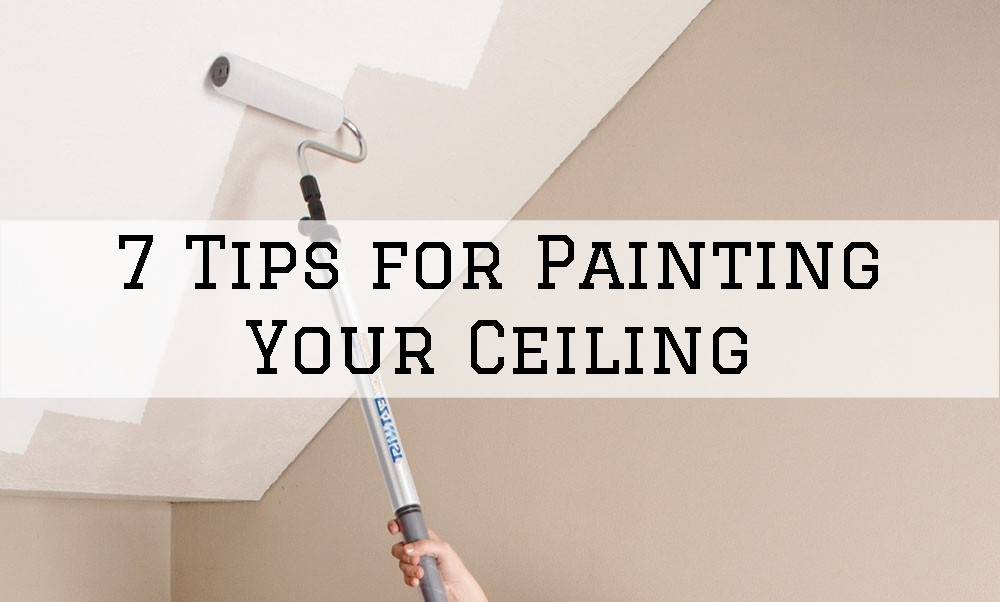
7 Tips for Painting Your Ceiling in Green Lake, WI.
Painting your ceiling is never an easy task, that’s why many people don’t consider repainting it.
It requires a lot of effort that will not only make your back hurt, but also tire out your arms.
However, giving your ceiling a fresh coat of paint even once every few years is the best thing to do if you want your home to be perfect.
With that in mind, here are 7 tips for painting your ceiling in Green Lake, WI.
1. Apply A Stain-Blocking Primer
Roof leaks due to heavy rain, smoke from the cigarette, and spills coming from an overflowing sink can all leave stains on your ceiling.
They are quite difficult to conceal with just ordinary paint, that’s why you need to apply a stain-blocking primer to cover these unpleasant stains.
In case you’re wondering what stain-blocking primer to use, many people use white pigmented shellac.
It’s up to you if you want to use spray cans or brush, but it’s easier and a lot better if you use the brush.
2. Don’t Forget to Sand Before Painting
As the layers of paint build up after a long time, crud can get stuck on your ceiling and it’s best to sand it before you start painting.
To achieve a perfectly smooth paint job and increase paint bonding, one of the easiest ways to do it is through a sanding pole.
When you’re done sanding, remove the dust by wiping your ceiling with a damp sponge so that there will be no problem painting it.
3. Cutting in Before Rolling
Before rolling, brush paint along the edges of your ceiling, one section at a time, to cover most of the brush marks with your roller.
The cut-in section will remain wet until you start rolling to make it blend in a lot better, that’s why this method is so advantageous.
Also, it is an entertaining task for any DIYers since it’s more fun to switch between cutting in and rolling in rather than simply rolling your paint.
4. Roll Carefully On Textured Ceilings
There are a lot of things that you need to consider before painting textured ceilings, that’s why it can be quite difficult for most DIYers.
If the texture has been painted over already, it’s safe to apply a new paint but if it has never been painted, there’s a chance that the water in the paint could cause the texture to loosen and eventually fall off.
You should avoid exploiting the paint and just roll it and leave it, never go back and forth with your roller as this can pull the texture from your ceiling.
5. Roll in Both Directions
There are several tricks to get a smooth painting job on your ceiling, and one is called “keeping a wet edge”.
It’s your key to avoid lap marks by moving quickly from one section to another so that the paint doesn’t dry.
To give you the best coverage, reroll each section immediately at the right angle to your first roller direction.
6. Choose Your Preferred Color
Most people don’t bother choosing the color that they want and just opt for the white color.
However, the characteristics of your room might make other colors a better option.
For example, if you want to make your room feel more spacious, paint your ceiling with a lighter color.
If you want a room that feels a bit intimate, paint your ceiling with a darker color.
7. Avoid Paint Freckles
Rolling paints on your ceiling shower you with a fine mist.
To avoid paint freckles, make sure that you’re wearing a baseball cap and safety glasses.
These safety gears allow you to watch your work without any worries.
If you need professional help with your interior/exterior painting and house washing project, Steves Quality Painting and Washing is here for you.
Our home interior/exterior painting and washing services are available in Green Lake and Princeton, WI.
Call us today at (920) 527-9478 for a FREE painting estimate.

7 Tips for Power Washing Your Home Exterior in Green Lake, WI
Power washing your home exterior is the easiest way to get rid of all the dirt and grime on its surface.
It’s also a great way to prepare the surface of your home’s exterior if you’re thinking of repainting it.
However, a lack of knowledge about power washing can possibly ruin and cause damage to your home.
To help you with your cleaning project, here are 7 tips for power washing your home exterior in Green Lake, WI.
1. Check for Damages That Need Repairs
Before you start power washing, you should first check for any damage to your home’s exterior that needs to be repaired.
Conduct a thorough inspection to confirm if there are any flaws or imperfections that you need to fix.
It is so important to repair even small damages because it has a high possibility to get worse after getting hit by your power washer.
2. Buy Necessary Tools
Power washing is not a job that’s only for the professionals, in fact, it’s a job that most DIYers love to do.
But if you’re planning to make it as your DIY project, you need to purchase the necessary tools to get started.
What you’ll be needing are the following: a power washer, a hose, cleaning detergent, and drop cloths.
You should also know how to use your power washer properly as it can cause serious damage to your home’s exterior when used the wrong way.
3. Wear Safety Gears
When power washing, you’ll be combining water with cleaning detergents or chemicals to achieve the best results.
To protect yourself from any harm caused by these chemicals, you need to wear safety gear such as gloves, boots, goggles, and full-body suits.
If you don’t have any full-body suit to wear, long sleeves and pants are the best alternatives.
4. Don’t Forget to Protect Your Plants, Vehicles, etc.
Power washing your home’s exterior can be a lot messy, and the chemicals are harmful to your plants as well.
With this in mind, don’t forget to ensure your plants’ safety by covering them or if possible, transfer them to a safe place.
If you find it inconvenient, you can at least spray some water on your plants since wet leaves absorb less water, which lowers the risk of getting affected by these harmful chemicals.
You must also not forget to protect and cover your vehicles and other things that you don’t want to get caught up with when you start power washing.
5. Do Some Prep Works
Before anything else, close all the doors and windows and turn off the power to the external electrical outlets of your home.
These electrical outlets are extremely dangerous when they get wet, so don’t forget to cover them with plastic and tape.
When you’re done securing your home, try your powerwasher on a certain part of your exterior that is unnoticeable.
This will help you determine the proper setting that won’t cause any damage to your home.
6. Check the Type of Paint
You must also check the type of paint applied to your home’s exterior before you begin power washing.
Make sure that its surface is not covered in lead, as applying high pressure to it can break it up and spread it into pieces.
When this happens, not only do you put yourself in danger, but you also put your family’s health at risk.
If you have no idea about what type of paint is used on your home’s exterior, you can ask a professional to take a look.
7. Up and Down Power Washing
Many people start power washing without planning, which makes them spend more time and energy than they’re supposed to if only they had anything to guide them.
One pro tip about power washing is to do it in an up and down manner and in a systematic way.
It means that you should know where to start and what area needs to be prioritized.
If you need professional help with your interior/exterior painting and house washing project, Steves Quality Painting and Washing is here for you.
Our home interior/exterior painting and washing services are available in Green Lake and Princeton, WI.
Call us today at (920) 527-9478 for a FREE painting estimate.
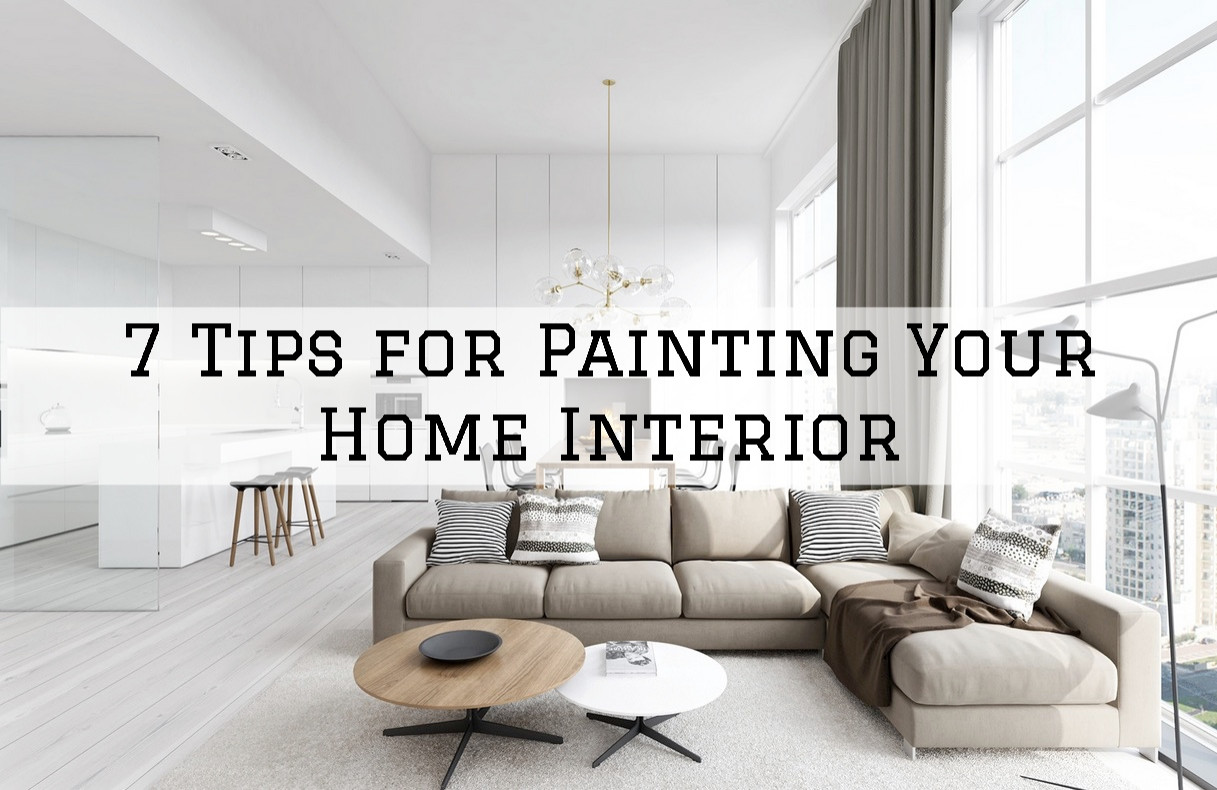
7 Tips for Painting Your Home Interior in Princeton, WI
Painting the walls and ceiling of every room is one of the best ways to revamp your home interior.
Although it can improve the overall look of your home, doing it yourself can also ruin it if you have no proper knowledge about what you’re doing.
With most DIY jobs like painting your home interior, knowing some tips can help you achieve better results.
Here are 7 tips for painting your home interior in Princeton, WI.
1. Conduct a Thorough Inspection
Conducting a thorough inspection of the area is necessary before you start any DIY painting projects.
When painting the interior of your home, you need to be aware of any imperfections of your walls and ceilings to achieve a flawless paint finish.
If you see any cracks, flakes, or peeling from your old paint, you should scrape and clean the area before you apply primer and your new paint.
Skipping this step will cause your existing paint to crumble after applying a fresh coat of paint, and you will end up redoing the job.
2. Protect Your Stuff From Spills
One way to protect your stuff easily from spills is by moving them away from the area where you’ll be painting.
There are things that you can’t protect by simply moving them out such as furniture, light fixtures, and of course, the floor.
To prevent your furniture and floor from getting messy, make sure to cover them using drop cloths or old blankets.
For your light fixtures and doorknobs, you can use plastic bags to protect them and secure them with tape.
3. Prepare Your Equipment
You can never start with your home interior painting project without getting your needed equipment ready.
Some of the things that you’ll be needing are brushes, rollers, painter’s tape, tools, and supplies.
For brushes and rollers, you’ll have to use high-quality ones to provide the best surface coverage for your home interior painting.
Tools and supplies include sanding papers for smoothing rough surfaces, a putty knife and spackling paste to fill cracks and holes, primers, and a ladder to reach high places.
4. Take a Few Safety Measures
Although painting is considered to be safe, taking a few safety measures is still needed to make sure everything is going smoothly as planned.
Don’t forget to wear safety goggles and gloves when working with chemical paint strippers or paint thinners to avoid skin burns.
A dust mask is also necessary when you’re sanding and painting to prevent you from inhaling any dust and paint fumes.
You also have to consider using old long pants and old long sleeves when painting since spills are quite inevitable, so it’s best for you to be ready for them.
5. Do Some Maintenance Work
You don’t need to apply a primer to walls with existing paint, but you have to do some maintenance work.
It is to make sure that the new paint will adhere well to the surface that you’ll be painting.
Start with removing the stains and dust from your walls, wash it well with water when you’re done, and make sure to let it dry completely.
You can also use a paint scraper to scrape off peeling, flaking paint to make your surface smoother.
6. Use the Right Primer
To provide an even surface for your new paint, it is recommended to use a water-based primer for your new drywall.
If you’re dealing with water-damaged or smoke-saturated interior walls, choose an oil-based primer.
For especially challenging surfaces such as glass or high-gloss paint, consider using a bonding primer.
7. Give Yourself Enough Time
The amount of time needed to complete your home interior painting job mostly depends on the size of your house.
Some parts of your home can be finished in just a few hours, while others may take 1 or 2 days to complete.
Make sure to manage your time properly and don’t rush when doing any jobs to have satisfying results.
If you need professional help with your interior/exterior painting and house washing project, Steves Quality Painting and Washing is here for you.
Our home interior/exterior painting and washing services are available in Green Lake and Princeton, WI.
Call us today at (920) 527-9478 for a FREE painting estimate.

The 7 Mistakes To Avoid When Painting Your Living Room in Princeton, WI
The living room is the part of your home where you can relax, have quality time with your family, and entertain your guests or visitors.
Painting your living room is not that easy; there are many things that you have to consider and mistakes you should avoid to make it more appealing.
With that in mind, here are 7 mistakes to avoid when painting your living room in Princeton, WI.
1. Using Cheap Paint Brushes And Rollers
Looking for the cheaper option isn’t wrong, but when it comes to painting, it is not recommended.
In the long run, you’ll end up spending more money on cheaper paint brushes and rollers than buying the ones with excellent quality.
Also, good quality paint brushes and rollers can last for a long time if you take good care of them.
2. Painting In Low Lights
Low light painting can affect the quality of your living room painting project.
It may seem perfect at first glance, but after turning the lights on, you’d see all the imperfections of the paint coat.
Remember that you should always paint with the lights on so that you won’t overlook any flaws and your painting job will be more efficient.
3. Not Using Painter’s Tape
If you’re new to DIY painting jobs, then you may not have any idea what a painter’s tape is.
Due to the lack of knowledge about the painter’s tape, it’s likely that a lot of people wouldn’t use it.
A painter’s tape is essential when painting your walls; using it will help you achieve perfect edges and well-finished walls.
Just make sure to remove the tape before the paint dries once you’re done with your work.
4. Over Brushing
It is important to paint the walls of your living room with the right amount of paint to get the best results.
However, excessive brushing can leave behind brush marks or ridges which can ruin the overall look of your walls.
For this particular reason, it is necessary to avoid over-brushing the surface of your walls when painting.
5. Poor Surface Preparation
Before painting your living room, you should prepare the surface of your walls first.
An uneven and unclean surface will be a problem for you since applying paint on it tends to be messy.
Scrape the existing paint from your wall properly, clean it thoroughly, and use a vacuum to remove any remaining particles.
Keep in mind that preparing your wall’s surface well before you start painting can save you a lot of trouble.
6. Not Considering Your Overall Color Palette
It is so easy to choose a color from all the options that you have, however, choosing the right color is not that simple.
For example, you picked your favorite color for your walls then after painting it, you find it inappropriate.
This is because the color that you chose doesn’t match the color palette of your home, floor finishes, and furniture.
Sometimes, it is necessary to consider getting paint samples first and see how they look.
7. Not Protecting The Things You Don’t Want To Be Painted
Spend some time covering your floor, furniture, and other important stuff that you don’t want to be painted using drop cloths.
Use a small plastic bag to protect your doorknobs and secure them with tape.
You should also remove the light switch and outlet covers, it won’t take much of your time.
After doing all these, you can now start with your living room painting project without any worries.
If you need professional help with your interior/exterior painting and house washing project, Steves Quality Painting and Washing is here for you.
Our home interior/exterior painting and washing services are available in Green Lake and Princeton, WI.
Call us today at (920) 527-9478 for a FREE painting estimate.

7 Tips For Painting The Exterior Of Your Home in Princeton, WI
Painting the exterior of your home has never been an easy job, but it is quite rewarding when you finish it.
However, there are a lot of things that need to be considered when painting your home’s exterior for you to achieve desirable results.
Here are 7 tips for painting the exterior of your home in Princeton, WI.
1. Use A Power Washer To Clean
It is inevitable for the exterior of your home to build-up dirt and dust over time.
Power washing your home’s exterior is one thing you should never skip before your painting project.
Control the power washer properly to efficiently clean all the dirty areas—from top to bottom—of your home’s exterior.
After you’re done power washing, make sure to let it dry before you start painting.
2. Repair Damaged Areas
Walk around the exterior of your home and check if there are damaged areas that need repairs.
Repair and seal any cracks or holes that you see by applying epoxy filler with the use of a spackle knife.
After you’re done sealing the cracks or holes, wait patiently for the epoxy filler to dry.
Once it is dry enough, sand it lightly and properly with a medium-grit sanding block before painting it.
3. Don’t Forget To Prime
To make your home exterior painting project more effective, use a quality sealer to prime.
A quality sealer has a high resin content that goes over old paint and makes a smooth surface for the new paint to stick to.
Paint will not adhere to a chalky surface, so use a chalky wall sealer if you’re repainting chalky or dusty walls.
Use a latex primer for vinyl and wood siding, and a hot stucco primer for a not fully cured stucco.
Make sure to check your primer or sealer to know the time you need to wait before you begin painting.
4. Choose A High-Quality Exterior Paint
In choosing a high-quality exterior paint that you will use, go with the 100 percent acrylic latex.
The formula consists of three main components — pigments, binders, and solvents.
Pigments provide color, binders hold the pigment to the wall, and solvents make the paint spreadable.
The solvents evaporate as the paint dries, leaving the other two components behind, known as volume solids.
Higher quality paints have higher volume solids; since they have better binders, they are more durable.
5. Pick Colors That Will Boost Your Curb Appeal
Choosing the color that you will use for painting your home’s exterior is not an easy task.
There are a lot of colors that you can choose from, but remember that vivid colors will fade sooner than the muted colors.
If you’re having a hard time deciding, try browsing the internet for ideas or spend some time walking around your neighborhood to see what color you find attractive.
Also, check if there are any paint color restrictions in your area; you don’t want to redo your painting job just because of this.
6. Protect Your Doors, Windows, And Lights
Painting can be quite messy so you need to protect the things that you don’t want to get caught up with your painting job.
Make sure to cover your doors, windows, and lights with plastic sheeting and painter’s tape before painting.
With this, you can start painting freely and without the need to worry about affecting areas that don’t need to be painted.
7. Spray And Roll
Spray and roll is an ideal way of painting the walls of the exterior of your home.
However, this technique needs two people; one that will spray and spread paint across the surface, and another one that will run a roller over it.
This will give you a uniform finish, especially for textured surfaces such as stucco.
Applying a second coat after letting the first one dry will give you better results; vibrant colors may need a second coat to get the full color.
If you need professional help with your interior/exterior painting and house washing project, Steves Quality Painting and Washing is here for you.
Our home interior/exterior painting and washing services are available in Green Lake and Princeton, WI.
Call us today at (920) 527-9478 for a FREE painting estimate.